Can you reuse microgreen soil? This article will solve your all concerns with logical reasoning and expert tips related to this query!
With microgreen planting growing in popularity, you may be wondering whether or not the soil is reusable. If you’ve ever cultivated microgreens, you’re familiar with the root system that is difficult to detangle from the soil. Can this soil be reused, or will you have to start with fresh soil?
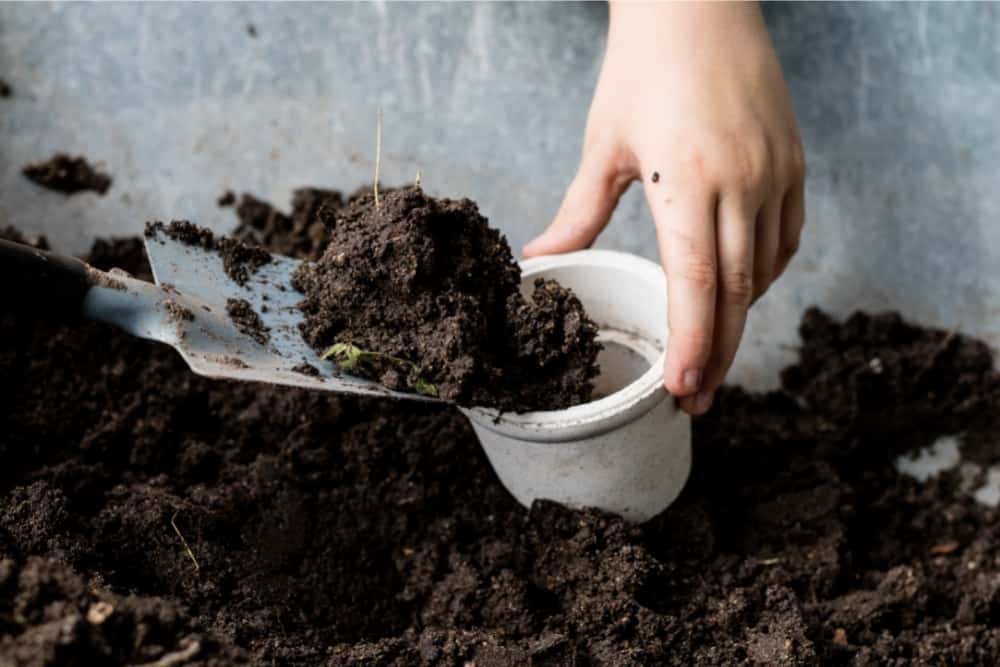
The good news is, you can reuse the soil after you’ve harvested your microgreens. It has to be composted for a month before reuse to break down the root system and restore the nutrients. Microgreens require nutrients. As they grow, they strip the nutrients from the soil. Composting replenishes it.
You’ll want to avoid certain pitfalls if you’re going to recycle your used potting soil successfully. There are also useful alternatives to composting as well as potting soil alternatives. Continue below for the tips and tricks to become a master of your growing medium.
Can You Reuse Microgreen Soil?
You can reuse microgreen soil, but the methods that you implement are crucial to finding success.
Before discussing how to reuse your old potting soil effectively, we should quickly touch on why you’d want to, and the benefits gained.
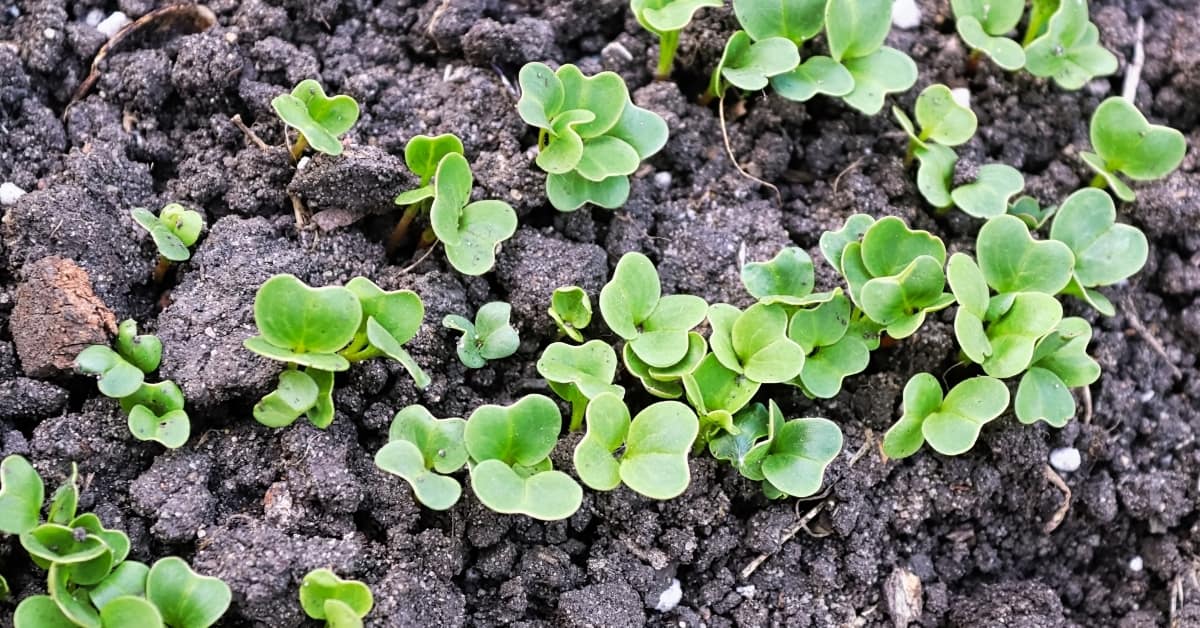
Since microgreens grow so quickly, they are an appealing option to cultivate yourself and add to your diet. Not only do they grow swiftly, but they are also high in nutritional value.
There are dozens of different microgreens types, but most will provide you with a good source of antioxidants and vitamins such as potassium, iron, and zinc.
Below are some additional benefits that you can achieve by growing your microgreens.
- Health benefits
- Money savings
- Know exactly where your food is coming from
- Environmental benefits
Now that you’re convinced of the benefits and want to grow your own microgreens, why should you want to reuse the potting soil?
The easy answer is the potential savings over time, especially if you plan to grow microgreens consistently. The savings won’t be massive initially, but with consistent growth, you can achieve those savings.
As we learn more about sustainability practices and the benefits of growing our food, microgreens have increased in popularity. If you’ve ever planted these before, you may notice that for as quickly as these microgreens grow, they seem to waste a lot of soil.
Most people will see the carpet of roots and soil and immediately toss it, not knowing all of this leftover dirt’s potential.
Though this soil does have the potential for reuse, incorrect treatment can lead to some adverse effects.
Adverse Effects of Reusing Microgreen Soil Without Proper Treatment
Before we discuss how to treat this reused soil properly, we’ll want to look at the potential negative effects of not following the proper procedures.
Nutrient Depletion
If you somehow took the time and removed the expansive root system from the remaining soil completely, you would still have an issue. You’ll completely strip the leftover soil of nutrients. Soil that doesn’t contain nutrients won’t yield healthy plants.

You can think of it like humans’ need for food. Food provides us with the strength and the nutrients we need to thrive. Without food, we would become weaker and weaker until we ceased to exist. Plants need the same care to survive. The soil is feeding these plants, so they become healthy and resilient.
Does this mean that the old soil is no longer useable? Simply put, no. It just means that you’ll have to find a way to reintroduce nutrients into your potting soil.
We will later discuss how you can reintroduce nutrients to your potting soil to make it a viable replanting method.
Mold
Microgreens are notorious for being highly susceptible to mold growth. Potting soil that is brand new, out of the bag, can even fall victim to the presence of mold.
Density is a primary factor in the prevalence of these microorganisms. Since microgreens grow so closely together, the soil doesn’t receive a lot of sunlight or air movement. The lack of sun reaching the surface of the potting soil can lead to the soil remaining moist.
Lack of light, coupled with an abundance of moisture, is the ideal breeding ground for mold.
There are potential ways to get rid of this mold if it happens to pop up, but it can lead to harming your plants and potentially losing them entirely. Mixing food grade hydrogen peroxide, water, and white vinegar has been shown to kill mold that pops up on your microgreens. You can also use a diluted bleach solution.
Dilute these solutions correctly, and they won’t harm your microgreens.
If the moldy areas are isolated, you can also simply just remove that area from the rest of your healthy microgreens.
Although you will have to combat mold, whether you’re using new potting soil or recycling your existing batch, the current set that got moldy will inherently be more prone to mold growth. Even if you manage to remove as much of the previous batch of microgreens and roots as possible, you will likely still end up with remnants.
If you do miss any remnants, these are likely to rot and breed more bacteria.
If you don’t change the soil besides removing the roots and remnants, you are starting with poor unsterilized soil. This soil is going to provide a better environment for microorganisms than new or sterilized soil will.
Finally, if you continue to have mold issues, you may need to sterilize your growing tray. Not adequately sanitizing your growing tray can leave It susceptible to becoming a hidden breeding ground for mold.
Methods for Avoiding Mold
Before we begin to talk about how to safely and effectively reuse potting soil, we should quickly discuss how to mitigate mold growth chances. Below are the easiest and most effective ways that you can stop mold growth in its tracks.
- Sunlight: Mold thrives in dark, damp environments, so the easiest way to combat that is with the introduction of sunlight. Ideally, natural sunlight is the best option, but if this isn’t available, then use an artificial light source, such as a heat lamp or fluorescent lightbulb.
Keep in mind that the likelihood of drying your plants out too much increases with the introduction of sunlight. Ensure that your microgreens are receiving enough water to remain healthy.
- Air Circulation: The density of microgreens means that the air at the soil’s surface level is relatively stagnant. This still environment is again excellent for the production of mold spores. Add an inexpensive fan, turning it on and off intermittently throughout the day to keep air moving through your plants.
- Humidity Control: Your microgreens need water to grow and flourish; however, it is partially this moisture that can lead to the presence of mold. Overwatering your microgreens is one of the leading causes of mold growth. So, how can you balance keeping your plants watered without providing the mold with an ideal growing environment?
Add a humidifier.
A humidifier will keep the tray or planter moist while removing the moisture in the air. Mold will have a more difficult time growing if the surrounding air isn’t damp.
Now that you grasp some of the negatives effects of not properly treating your used soil, we can delve into the correct methods.
How to Successfully Reuse Microgreen Soil
Now that we have sufficiently touched on some of the adverse effects of improper reuse of microgreen soil, we can discuss how to be successful. Two main methods are recommended to increase the odds of successful potting soil reuse.
Composting
Your most significant ally when it comes to successfully reusing potting soil is time. Time is so crucial because having soil that you can reuse takes roughly a month.
The method for taking this used, nutrient-depleted soil, and returning it to a fertile state is known as composting.
Composting is a fruitful alternative to new soil thanks to the prominent money-saving aspect and the sustainability you can achieve. The savings won’t be huge per plant, but as you continue to grow your microgreens consistently, the savings will become more substantial.
From a sustainability standpoint, you create a self-sustaining ecosystem where new potting soil isn’t required.
Not only will you need time to compost correctly, but you’ll also need a warm area. We’ve discussed how properly composting takes about a month, but this timeframe could increase if you compost in a cool location. Warmth assists with the process of breaking down the organic material leftover in the soil.
While composting is a straightforward process, you will want to follow the subsequent steps to maximize your efforts.
Once you have harvested the microgreens, stems, and roots remain, creating a soil carpet.
For everything to compost completely, you must break apart the carpet. Once it’s broken down, this tangled root system and the accompanying stems transform into the soil’s nutrients.
For the next step, you’ll need a compost bin or something acting as a compost bin. After placing your broken-down material into the compost bin, the process can begin.
Below are a few tips to assist this process.
- Add water to the soil: Adding water assists in speeding up the composting process.
- Keep the soil warm: Keeping the soil mixture warm also helps to speed up the composting process. The warmer the blend, the faster the organic materials will decompose to release nutrients.
- Stir the compost periodically: Periodically stir your compost, to allow moisture and air to circulate throughout your soil. Mixing the compost enables the heat to reach each part of the soil evenly.
- Don’t comingle materials: If you have an existing compost bin, avoid adding your microgreen compost to that mixture. Mixing different materials can slow down the composting cycle if your other compost takes longer to break down.
After a month, the product created is a dark, nutrient-rich soil.
Sterilizing the Soil
As we’ve discussed, one of the significant issues with immediately reusing soil from microgreens is that it is inevitably an inferior product where microorganisms may thrive. If you don’t have the patience to wait a month to compost, what options do you have to make this soil usable?
Sterilization through heat.
More specifically, taking your used microgreen soil and placing it in the oven, microwave, or steamer.
The most challenging part of this process is separating the useable soil from your microgreens’ roots and stems. Luckily, microgreens don’t use a lot of soil, so if you can separate the roots, you’ll have plenty of useable soil remaining.
The preferred method for soil sterilization would be putting it in the oven.
After you separate the soil from the roots, you shouldn’t return it to the plastic grow tray, or it will melt in the oven.
Place this sifted potting soil onto a baking tray in an even layer and bake at 160-180 degrees for about 2 ½ hours. Don’t be alarmed if, during the process, you begin to smell a burning aroma; this is normal.
At the end of this 2 ½ hours, sterile soil remains.
You may be thinking to yourself if the soil is sterile, how will it be an ideal environment to produce more microgreens? The short answer is it’s not.
Sterilization kills any potential microorganisms but doesn’t add the necessary nutrients needed to grow microgreens. So, if you use this method, you’ll need to add nutrients separately.
These nutrients can come in the form of fertilizers like worm castings. Worm castings are an organic fertilizer that stimulates plant growth while also increasing soil’s ability to absorb water. Not only do they provide growth advantages, but only a small amount is needed to add sufficient nutrients to your sterilized soil.
Hybrid Method
There is a hybrid method that you can use, which we wouldn’t necessarily recommend. This method does work if you absolutely can’t wait the month for your soil to compost entirely, or don’t want to sterilize your soil in the oven.
This is called a hybrid method because while you are reusing the existing soil, you’ll also need to add a thin layer of new soil. For this reason, this isn’t an entirely self-sustaining method.
- After cutting your microgreens, take the remaining roots and soil and break it down.
- Return this mixture to your growing tray
- Sprinkle microgreen seeds over the top of the broken-down used potting soil and remnants
- Cover the seeds with a thin layer of new potting soil and care for them as normal
The theory behind this technique is that while the new seeds are taking root, the existing soil and root mixture is composting, adding nutrients.
Some say that this technique works; however, most remain skeptical and only use it as a last resort.
During the germination phase, the microgreens are the most nutrient reliant. Standard composting methods take about a month before you can reuse the soil. Microgreens grow quickly and based on how long the composting process takes, most believe nutrients don’t return to the soil fast enough to be optimally beneficial.
Alternatives to Potting Soil
An alternative to potting soil that is a frequent choice for planting microgreens is hydroponic growing pads. These hydroponic pads fall into two categories, natural and synthetic fiber.
Natural options include:
- Hemp
- Wood
- Coconut Fiber
Synthetic options include:
- Felt
- Paper
The various options that are available as soil alternatives have their advantages and drawbacks. The sustainability of these growing pads is a clear disadvantage when compared to traditional potting soil.
These pads aren’t reusable, meaning that each time you plant another batch of microgreens, you’ll need a new pad. So, not only does the cost begin to add up, but so does the waste.
You may be thinking to yourself, aren’t these pads biodegradable? While this is true, the time they take to degrade can be years long. Waiting years isn’t the most sustainable option.
A prominent advantage that you’ll receive from these pads is that they are a cleaner option than having to use soil. In situations with kids or pets, that may be a huge benefit.
They also are less susceptible to mold, which, as we’ve discussed throughout, is a huge issue to tackle when using soil. But, of course, there are easy ways to stop this from happening.
Final Thoughts
Throughout this guide, we’ve discussed different methods for reusing potting soil and alternatives to traditional soil. While each of these various techniques has its limitations and advantages, it’s crucial to figure out what factor is most important to you.
You have to determine if you have enough time to traditionally compost or if you want to take the approach of sterilizing and adding nutrients for more instant gratification. You’ll have to determine if sustainability is at the top of your planting checklist, or if the downsides lead you to a less sustainable method.
Either way, we hope we have provided you all the information you need to make a well-informed decision for growing your microgreens.
So what do you think can you reuse microgreen soil now? Let us know in the comments section below!