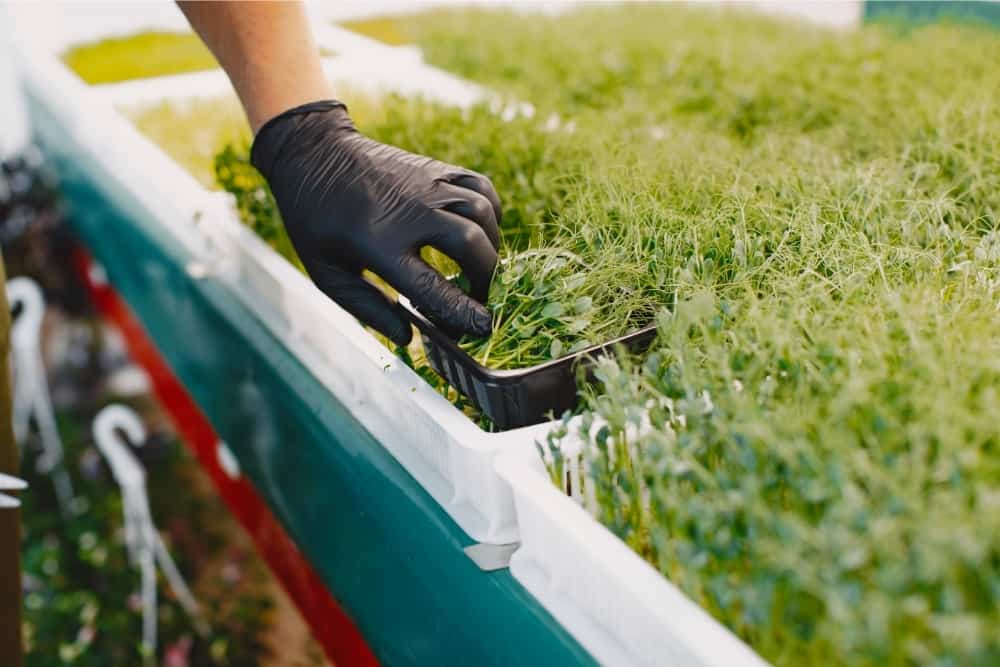
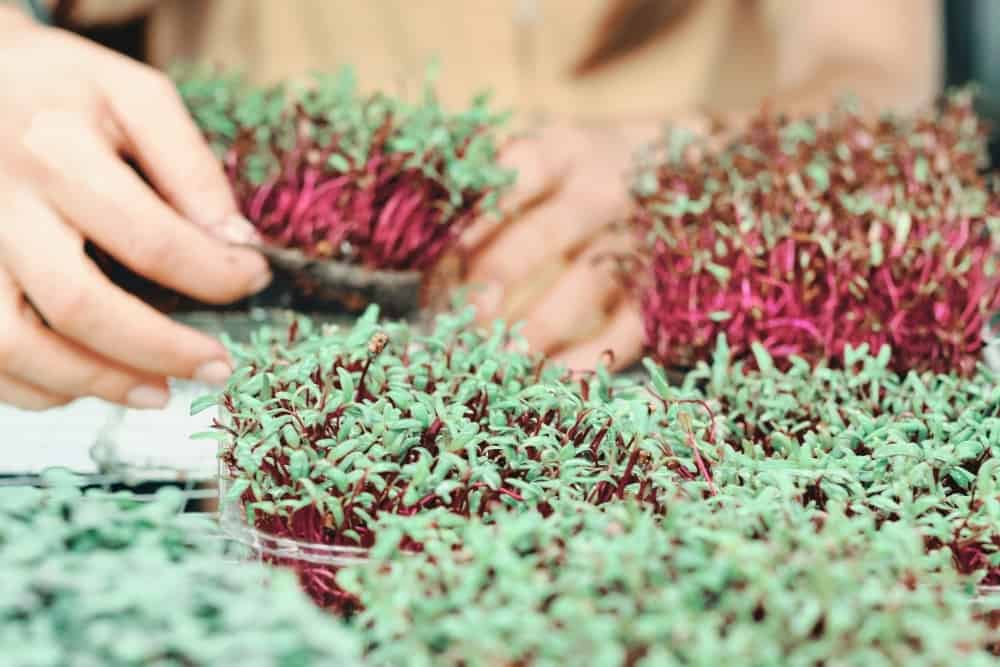
Eating after harvesting microgreens is a healthy alternative to buying them in the store; you can ensure they are free of chemicals. So, you do not have to waste money when you throw out spoiled food. However, one of the hardest parts of raising microgreens is knowing when it is the right time to harvest your bounty.
Gardeners should look for the following signs to confirm microgreens are ready to harvest:
- The seedlings are one to three inches tall.
- The seedling has grown its first set of “true leaves.”
Each microgreen species you plant has an average time to wait from when you plant the seed until they are ready to harvest.
Microgreens are young plants, also called seedlings. If you harvest these mini plants before they are fully mature, you can sprinkle them on salads, blend them in a smoothie, or pile them on a bagel with cream cheese to add an aromatic flavor. However, making sure you’re harvesting at the right time is key to quality microgreens.
When Are Microgreens Ready to Harvest?
Although it depends on the species you planted, most microgreens are ready to harvest one to three weeks after planting.
Each plant takes a different amount of time to germinate and grow, which means that several plant varieties will be ready to harvest at different times. (Germination is the process of a seed turning into a seedling before sprouting its roots and stem.)
In other words, the most significant variation in growth time is from when you pop the seed into the ground until it develops its first set of true leaves, not just the cotyledons—also called “seed leaves” (more on this later).
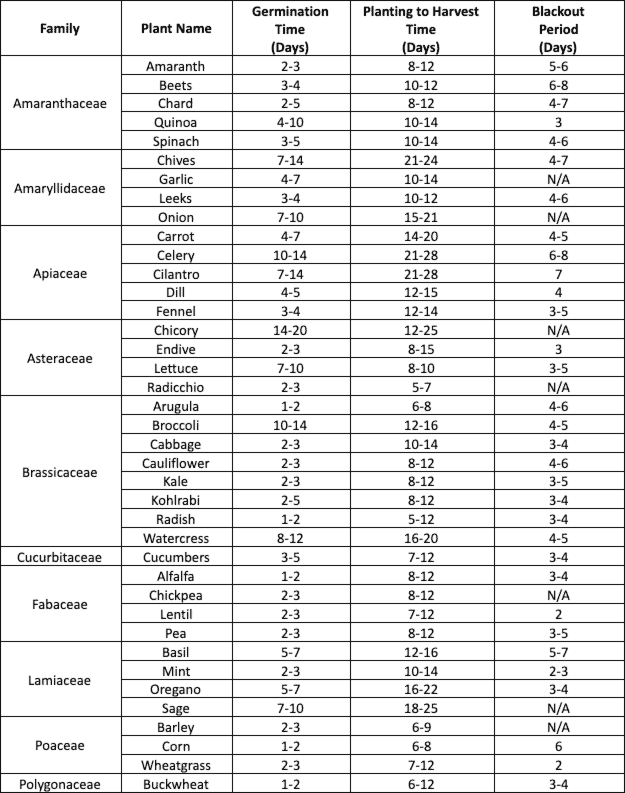
Top Plant Harvest Times
As you can see from the information above, you can select from a wide range of plants to grow as microgreens. When harvested, these little seedlings will have a concentrated flavor similar to their mature form.
If you plan on growing your microgreen outdoors, be sure to read the seed packet. It will tell you what month or season the best planting time for that variety is. You can also create a mini-greenhouse indoors, which will let you grow microgreens any time of year. In the table below, you will find information for 39 commonly grown microgreens. The plants are grouped together by their scientific families. Note: The germination and harvest times listed are estimations under ideal conditions. Each seed is unique and different varieties of each plant have their own growing speed.

Speeding Up the Growing Process
Growing microgreens is a simple process with fast results. However, sometimes, it is nice to have your yield be ready a bit faster.
By adjusting your growing setup, you can speed up the process and have your microgreens ready to eat sooner.
Add a Heat Mat
You can encourage your microgreens to grow faster by placing their growing tray on a heating mat. The increase in temperature will spur the seeds to get growing.
Seed heating mats are designed to be safe and energy-efficient. They provide gentle warming to the roots, which encourages each plant to grow faster. When outdoor temperatures are lower in the winter, a heating mat is also beneficial to keeping your seeds at the necessary temperature.
Here are a few seed heating mats worth checking out:
- VIVOSUN Heating Pad – $12.99
- Durable
- Waterproof
- Energy Efficient
- Maintains a Temperature of 68 – 86 Degrees Fahrenheit
- 10 x 20.75 Inch Mat (other sizes are available)
- Growerology Heating Pad – $21.99
- Durable
- Waterproof
- Indoor or Outdoor Use
- Insulation Piece to Increase Efficiency
- 6 Foot Power Cord
- 10 x 20.75 Inch Mat
- Warms Seeds 10 – 20 Degrees Above the Room’s Temperature
- Propagate Pro Heat Pad – $33.97
- Heavy Duty
- Waterproof
- Warms Seeds Up to 20 Degrees Above Ambient Temperature
- 1000-Watt Plug-In Thermostat Controller
- 6 Foot Power Cord
- 10 x 20.75 Inch Mat
Add Some Light
Most microgreen plants need at least four hours of sunlight each day. In the summer, you can often place them in a south or west-facing windowsill to achieve this. However, if this placement is not possible in your home or there is less sun where you live during the rest of the year, investing in a grow light will help.
Grow lights are built to provide plants with the light spectrum they need to perform photosynthesis, lights in the red and blue spectrum. There are different styles and sizes of grow lights, so you can find one that fits your space.
You can place your seed tray under a grow light for up to 12 hours per day. Many grow lights are programable, so you do not need to worry about turning the light on and off. With direct light and extra quick growth, be sure to monitor your seedlings to make sure they have enough water.
Here are a few grow light options, perfect for your microgreens:
- Grow Book Microgreen Planter Kit with LED Lights – $35.00
- Growing Tray
- 32 LED Lights
- USB Cable
- Nutrient-Rich Soil
- 8 x 7 Inches
- EZORKAS Gooseneck LED Lamp – $30.99
- Auto On/Off
- Timer
- 80 LED Lights (52 red and 28 blue)
- 9 Dimmable Modes
- 3 Spectral Modes
- USB Cord with AC Power Adapter
- 4 Heads each with 360 Degrees of Flexibility
- Metal Clamp
- VOGEK Gooseneck LED Lamp – $34.99
- Auto On/Off
- Timer
- 132 LED Beads
- 3 Switch Modes
- 10 Brightness Settings
- Choose to have one, two, or all three lights on
- 72 Watts Total – 24 Watts Per Bulb
- Desk Clip
A grow light can be used to supplement natural sunlight, or so you can grow microgreens in an otherwise dark area.
How to Tell When Microgreens Are Ready to Harvest

Knowing when a plant is ready for harvest, either as a microgreen or at maturity, can be tricky unless you know what you are looking at. Fortunately, there are several ways you can tell when your microgreens are ready to pick:
Look at the Microgreens’ Size
Some plants grow fast, while others grow slowly. However, when your microgreens are ready for harvest, a good indicator of when they are between one and three inches tall.
If you harvest when they are under one inch tall, they will likely not have the flavor you’re anticipating. In contrast, if you harvest when they are over three inches tall, they may have a taste more akin to their mature counterparts (which may be what you want, depending on your preference).
Look for “True Leaves”
Plants are typically categorized by their characteristics. Most microgreens are characterized as dicots, which means that their seeds have two cotyledons or “seed leaves.”
After the root has anchored itself in the soil, the microgreen seed puts its energy into growing upward. The stem grows and pushes the seed up out of the soil and into the air. The first pair of leaves that develop are the seed leaves, which are very small and simple looking.
However, this is not when you should harvest. The ideal time will be after the microgreens develop their “true” leaves or the “second” set of leaves they develop after this phase.
The microgreens get to this point by using their seed leaves to photosynthesize; this helps the seed reach its last burst of growth to transition from sprout to stem. As the stem grows taller, the first pair of true leaves unfurl. In appearance, these leaves are scaled-down versions of their mature form and are often hairier than the seed leaves.
Once you see that first set of true leaves, your microgreens are ready for harvest.

Give Them a Taste
The exact moment your microgreens are ready to harvest is also up to you and your taste buds. Even if they sprouted their first true leaves, it doesn’t mean that they’ve reached the maturity level required for the flavor you want to achieve.
After that first pair of true leaves unfurl, take a sample each day. Pick on microgreen and give it a nibble. If you like the taste, then you can harvest. If not, try the next day again.
Play around with your harvest and keep a harvest journal. Some things to record in your journal are:
- Plant variety name
- Actual germination time
- Number of days to grow first true leaves
- How many days it took from planting until harvest
- Notes about if you should have harvested sooner or waited longer
- Notes about light and watering
That way, the next time you decide to grow a microgreen variety, you’ll have a good idea of what worked and what didn’t keep this batch of greens growing strong from the start.
How to Harvest your Microgreens
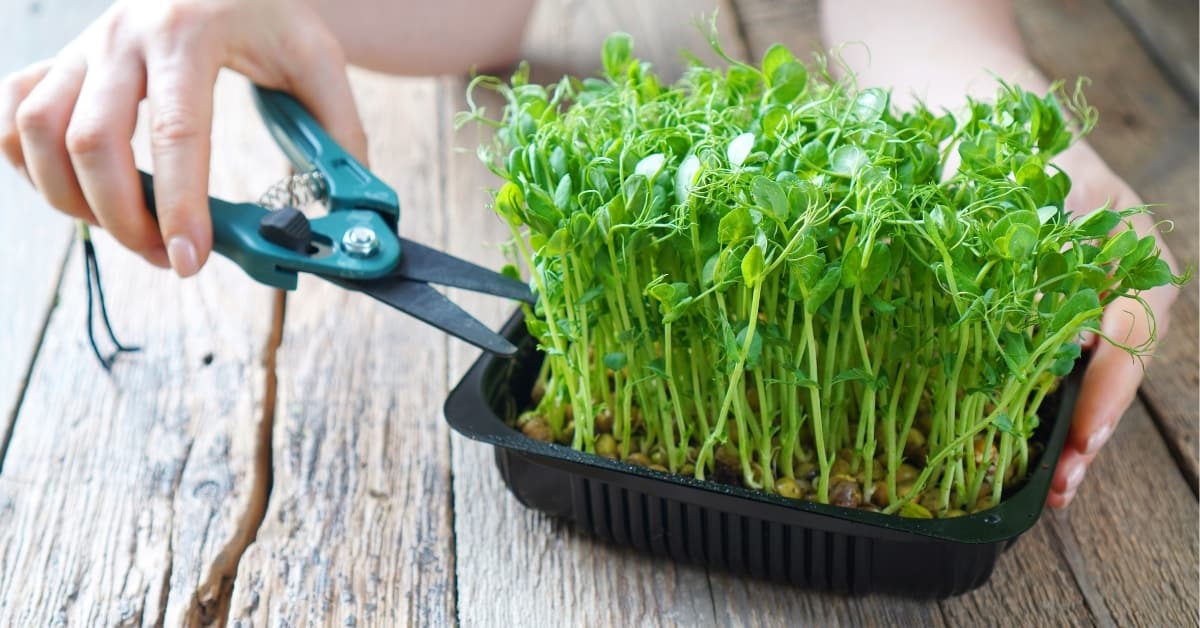
When it comes time to harvest, there are two methods you can use:
- Pull the whole plant up.
- Cut the shoots off.
The method you use will depend on the microgreen variety. For example, if you leave the roots in the ground for some microgreen species, they will regrow, allowing you to harvest from them multiple times. A few types of microgreens known for regrowing and harvesting are:
- Beans
- Kale
- Peas
For other microgreens, once you trim them, they are done. For these plants that do not regrow, pulling them out, root and all, is the best method. There is no reason to leave the root in the ground.
If you are not sure which plants will regrow, try experimenting. After you cut your first harvest, continue to provide the correct amount of light and water, and see what happens. If you see regrowth, then continue what you’re doing; if not, you can pull the roots out and compost them.
Otherwise, if you want to start over from scratch, simply mix some new compost or organic fertilizer into the soil, and you can sow the seeds for your next batch.
The more practice you have at being a microgreen farmer, the better you’ll understand your plants. There is always an element of trial and error when it comes to growing plants, so if something doesn’t work out the first time, don’t give up!
Storing Your Harvest
One way to go about harvesting and eating microgreens is to harvest only what you need. Each day, trim enough off for your smoothie or salad and leave the rest growing. The downside to this, though, is some microgreens will be harvested on the early side, but the others will start to become tough. On the other hand, you don’t have to worry about them spoiling.
If you prefer to harvest your microgreens all at once, storing them properly will help keep unwanted fungi and bacteria away. Once you pull or snip your greens, give them a gentle rinse; will wash away any clinging dirt.
If you leave soggy microgreens in the fridge, they will turn into a pile of green goo, so after you rinse them off, be sure to dry them.
Here are three tips to keep your microgreens looking good after rinsing:
- Pat Them Dry: Give your greens a thorough rinse and lay them out on a clean tea towel. Gently pat your microgreens with the towel until they are dry.
- Give Them a Spin: If you have a salad spinner with small enough holes that the greens don’t go flying, you can give them a spin.
- Give Them Some Air: Once you rinse the greens, give them a shake, so the water comes off. They will still be damp, so lay them out on a tea towel or paper towel and air dry. Keep an eye on them, though. If you leave them out for too long, they will start wilting.
After rinsing and drying your microgreens, it is time to eat them or store them away.
If you are storing your microgreens for later, it is best to keep them in the fridge. First, lightly moisten a paper towel and fold it in half. Next, tuck your greens between the sheets. Finally, slide the folded paper towel with greens into a resealable bag or a container with a lid and pop it into the fridge.
When you need some greens, simply open the bag, pull out what you need, and reseal it. If the paper towel is feeling dry, add a little water to moisten it. You want the paper towel to be damp but not soggy. Keeping your microgreens stored in this way will keep them fresh for about a week.
Once you have this harvest of microgreens stored away, set up your growing tray for the next batch. Depending on what veggie starts you are growing, you can have one batch ready to harvest right when you finish eating the ones stored away.
In Conclusion
Microgreens are very simple to grow and harvest. They have bold flavors and are bursting with nutrients. You can pick from a long list of plants to grow; almost any veggie will do. (Radish microgreens are considered the fastest to grow and harvest, so if you’re in a hurry, these make a great choice!)
However, keep in mind that each variety of plant is going to have a specific growing period. The seed packet you purchase will generally tell you how long it takes for the seeds to germinate.
During germination, the sprout will break through the soil; each sprout will develop one or two cotyledons, which are seed leaves. These might look ready for harvest, but you’ll have to wait a bit longer—after seedlings have developed their first pair of true leaves and are between one and three inches in height. Then, it is time to harvest and enjoy!

