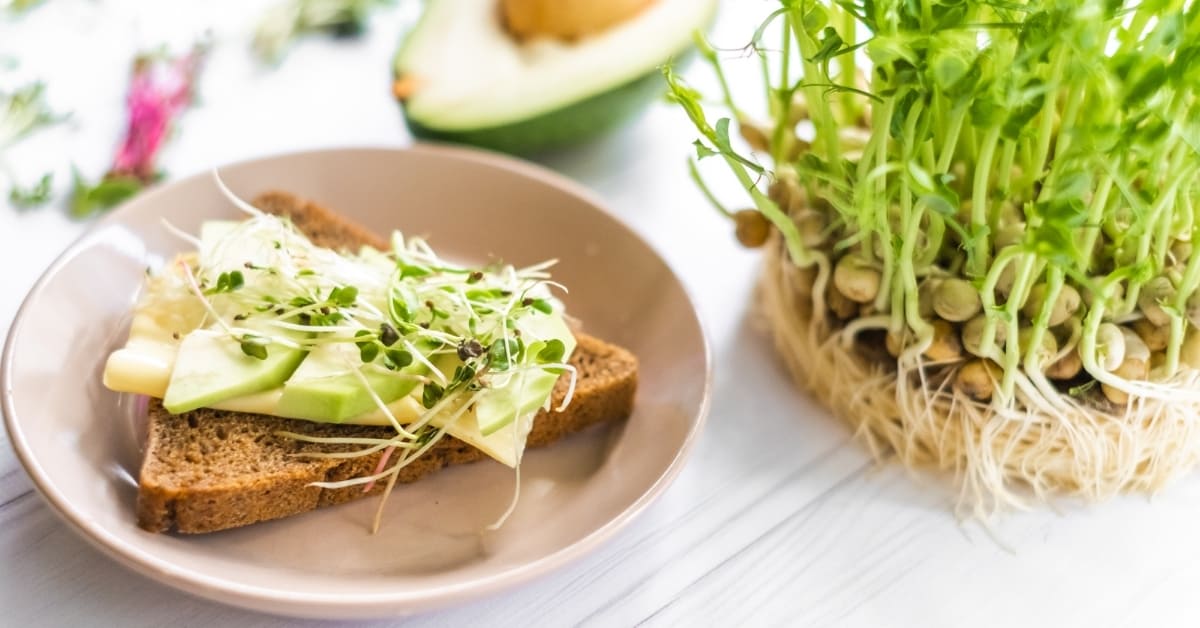
In this article, we will explore the best practices for how to store microgreens and preserve them. Plus, we will cover tips for home growing and harvesting, as well as benefits and varieties of microgreens.
Microgreens have grown more and more in popularity for chefs and food fanatics across the globe. These seedlings have many uses and often have more nutritional value than fully mature plants – that is if they’re kept fresh and healthy.
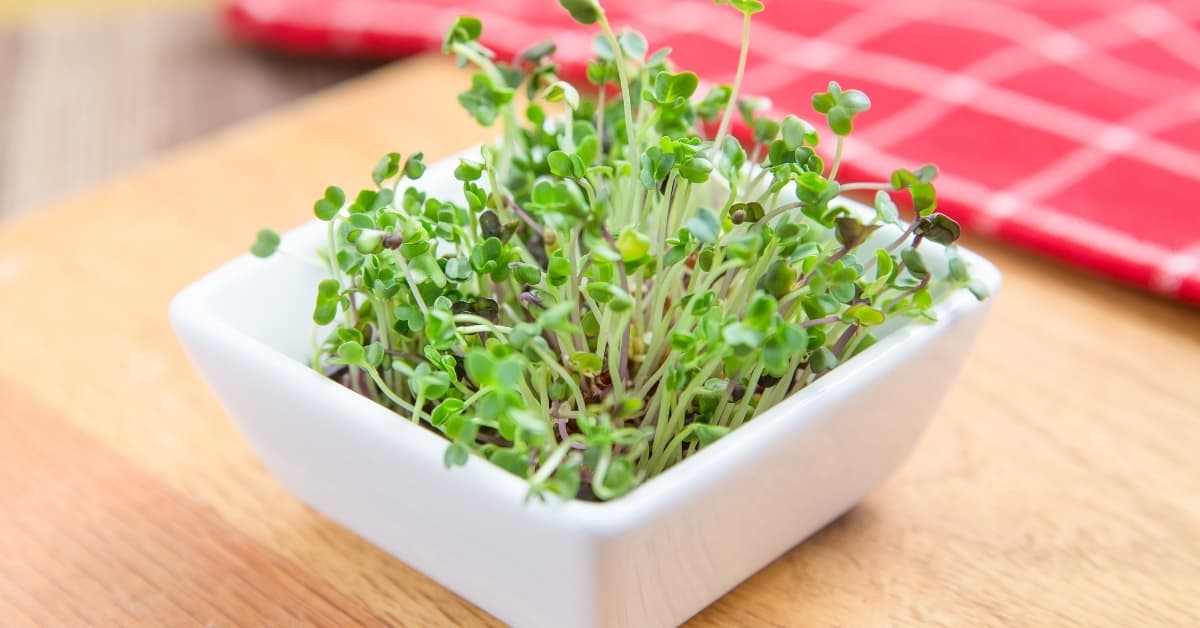
The freshness and health of microgreens are relatively easy to maintain. Keeping them refrigerated at the correct temperature, maintaining a low level of moisture, and storing them in the proper containers is the best way to ensure longevity. Microgreens can also be dehydrated as a method of storing.
How Do You Store and Preserve Microgreens?
Luckily for those new to microgreens, it is not difficult to store and preserve them. The main aspects to keep in mind are temperature, air, and container type.
Microgreens are sensitive to the temperature they are kept in, so consistency is crucial. Moreover, the crops need the right amount of air to maintain some moisture without becoming soggy. Proper containers are essential in achieving this.
Keep Them Refrigerated
The general rule of thumb is that microgreens need to be refrigerated. This is mainly because room temperature may be too hot or inconsistent, thus causing early decay of the crop. That being said, it is vital to make sure the fridge is not too cold for them.
Brand new refrigerators will have the most consistency of temperature and humidity. However, older models may fluctuate more. Proximity to entrances and exits, or ovens or other heated appliances, can also significantly affect the inner temperatures of fridges.
According to Thunder Mountain Foods, microgreens should be stored in 38 – 40 degrees.
Thunder Mountain Foods also states that microgreens can typically be stored between 5 – 8 days. If the crops are freshly harvested, they can potentially last much longer, up to two weeks. Increasing the longevity of the microgreens is also dependent on proper storage.
It is not recommended to freeze microgreens. This is because freezing can degrade the nutritional value. Plus, microgreens do not thaw well and often become bruised, damaged, or sloppy. It is best to use microgreens within a week of purchasing or harvesting.
Wrap in Damp Paper Towel
Too much water on microgreens can cause the crop to decay, grow mold, or become soggy. However, too little water can dry out the plant improperly. It is crucial to maintain a low level of moisture to ensure the health of your microgreens in their storage container.
The best way to achieve this is to either wrap them in a damp paper towel or place the paper towel on top of them. The crops themselves should be dry when placed inside the container. This way, the microgreens still have access to moisture without being wet themselves.
By storing them with a small amount of moisture, microgreens will last longer and maintain their freshness. This makes it much more likely that they will keep their flavor and fullness throughout the storage period. This can also negate the harmful effects of a fridge with too little humidity or fridges that are too close to sources of heat.
It is good practice to check on your microgreens throughout the week to ensure they are not gaining or losing too much moisture. Look out for sogginess, decay, or stiffening from drying. If your crops display these symptoms, they may need different storage. Crops bought from the store may not be exceedingly fresh, and thus may decay quicker than those that are homegrown.
Use Correct Containers
As mentioned, microgreens are highly sensitive to the environment they are kept in. Thus, if they are left out in the open air, they can degrade much quicker. Fluctuations in temperature and humidity will significantly affect how long the crops last.
For this reason, it is crucial to keep microgreens in air-tight containers, such as Tupperware or Ziploc bags. These types of storage containers will help to regulate moisture and airflow. Plastic containers are the most recommended.
If you choose to dehydrate your microgreens, storage is more straightforward. They do not need to be kept at a specific temperature, and the air-tight container requirement is less necessary. However, it is still good to keep dehydrated crops in closed bags or containers to prevent bugs or bacteria from entering.
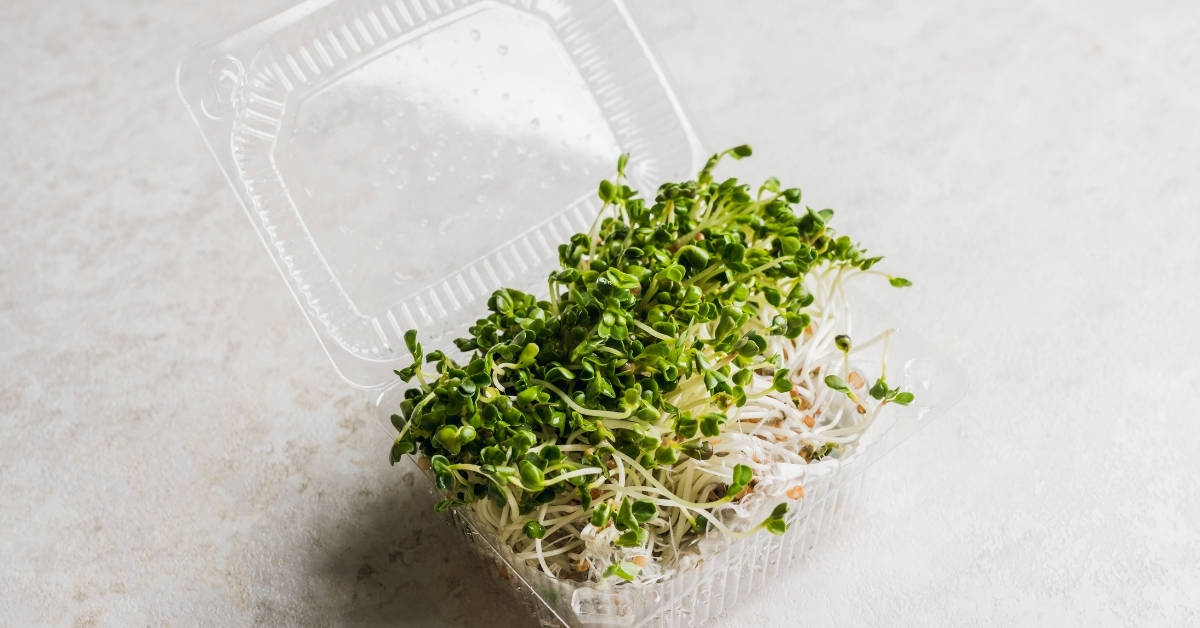
Storing Options
As we have covered, microgreens should be stored in air-tight containers. They should be refrigerated and include damp paper towels for moisture maintenance. There are several types of containers to choose from, including clamshell boxes and plastic bags. According to R & D Acres, clamshells and Tupperwares are most effective, keeping crops fresh for up to two weeks.
It is important to consider the material your storage container is made from. Plastic containers will work best for microgreen storage. This is because they do not build up condensation as much as glass or metal containers do, making a more consistent environment for your crops. Too much condensation build-up can throw off the moisture balance of the microgreens, causing early decay.
Clamshell Containers and Tupperware
A clamshell container is a storage box where the lid is attached to the box. Often, they will have extra space in the lid. These types of containers are great for microgreens because they provide additional space for storage. This extra space can also help give the crops room to breathe. Clamshells are usually made of plastic and not dishwasher safe, so cleaning will have to be done by hand.
Clamshells do sometimes come made from cardboard or similar materials. Some may think this is a better option because they are recyclable and better for the environment. It is not recommended to use these types as they may hold and absorb too much moisture compared to plastic types, causing the microgreens to go bad sooner.
Unfortunately, plastic clamshells are regarded as single-use products and should not be used repeatedly. A better, more sustainable alternative would be to use plastic Tupperware. Tupperware products are designed to last over long periods of time, making them good reusable options. Glass Tupperware is also an option but remember to be cautious of condensation.
These types of containers vary in dishwasher safety, so you may need to wash by hand after use. It is critical always to clean your containers between uses to prevent any build-up of debris or bacteria. Microgreens are highly sensitive, so sanitized storage containers are a must.
Produce Bags
If you have limited storage space in your fridge, box-type containers may take up too much room. Produce bags are a viable alternative. Bags can be found in a variety of materials. The key is to use a bag that is sealable to prevent too much outside air or moisture from entering.
When choosing a bag, there are a few options. The most common bag used for microgreen storage is plastic Ziploc or similar sealable bags. These products will provide the necessary air-tight quality as well as producing minimal condensation. However, like clamshells, they are not necessarily recyclable or sustainable.
Unfortunately, many reusable produce bags are often not sealable. While they can be tied off, this will not produce the same effect as an air-tight bag. Therefore, it is more recommended to use sealable plastic bags. These can be rinsed and reused but should not be reused if food has gone bad in them. Be sure to turn the bag inside out after rinsing to allow it to thoroughly dry before storing microgreens inside.
Dehydration
Dehydrating microgreens is a useful way to store and keep the crops for much more extended periods of time. Dehydration is a process of heating and drying to preserve the food for sometimes infinite amounts of time.
The most common method to achieve this is to use an actual dehydrator. Using an actual dehydrator is the best way to dry out your microgreens properly. Unfortunately, this equipment can be quite expensive if not already owned.
Luckily, there are alternative ways to dehydrate crops. One way is to use an oven. The drawback of dehydrating in the oven is that it will often be too hot and overcook the greens. With dehydrators, the temperature is usually set between 100 – 120 degrees Fahrenheit. The lowest setting for most conventional ovens is between 170 – 250 degrees Fahrenheit. Nonetheless, this can still be used as a method of dehydration if done with caution.
Another way to dehydrate microgreens is to hang them upside down and place a brown bag over them. This process will take the longest. According to Little Sprouts Learning, greens should hang for around two weeks. However, this process also requires very little equipment – just some string or ties and a brown bag.
Dehydrated microgreens are best if ground up and stored in a jar or container. Unlike fresh greens, these do not necessarily need to be air-tight containers, although they should be kept out of moisture. These ground microgreens can then be used in all sorts of recipes, from casseroles to smoothies. It is important to note that the dehydration process does diminish the nutritional value of the microgreens.
Ways to Prolong the Life of the Crop
While the average amount of time microgreens can be kept in storage is approximately a week, there a few ways to ensure they last that long or even longer. Storing microgreens can be a relatively hands-off process; however maintenance and preparation before and during the storing process can significantly increase the longevity of your greens.
Sterilize Before Storing
Both the microgreens and the container must be cleaned and thoroughly sanitized before storing. This is crucial for a number of reasons, but the primary purpose of this is to prevent the growth of mold on your greens. Bacteria or chemicals can contribute to the growth of mold or early decay of the crops. Other reasons include removing chemicals or fertilizers and cleaning off excess dirt or debris.
While it is highly important to clean your crops before consuming, it is also crucial to clean and dry them properly. As we have covered, microgreens are very sensitive and can be easily damaged. To clean, they should be washed in cool, but not cold, water. The water pressure should also be light.
For drying microgreens, the best approach is to pat them dry lightly. Other methods include straining and shaking, or using a device known as a salad spinner. Salad spinners are a straining gadget that uses the spinning motion to dry off lettuce, herbs, and greens thoroughly. Use spinners with caution so as not to bruise the microgreens. The crops should be thoroughly dry before storing them.
As for sanitizing the container, it is best to use dish soap and water. Never use bleach as remnants of this chemical can significantly harm the plants. Likewise, soap should be thoroughly rinsed before placing greens within.
The container should be dried thoroughly before using it for storage. The purpose of washing the container is to remove any surface chemicals from production or debris from past storage uses.
Prevent Premature Drying
We have already discussed the importance of using a damp paper towel to maintain low levels of moisture in microgreens. However, there are more ways to prevent drying out of the crops. It is critical to take preventative measures as premature and improper drying can significantly diminish the nutritional value and flavor of microgreens.
The most important step to take to prevent improper drying is to refrigerate your microgreens right away. Whether buying them from the store or local farmer’s market or harvesting them from your own home garden, the greens should be transferred to the proper storage container as soon as possible.
Additionally, microgreens should be kept out of excessive light once harvested and stored. In contrast, adequate light is essential during the growing process; once harvested, light can dry the crop out fairly quickly. To avoid this, use containers with darker or non-transparent lids. It can also be useful to keep your greens on a lower shelf, assuming the temperature of your fridge is consistent throughout.
Give Them Enough Space
Microgreens need enough room and space to breathe. Without enough space, they can wilt, build up too much moisture, and grow mold. While mold can be prevented mainly by drying the crops before storing, they still have moisture within them that can be drawn out.
This effect of the moisture being drawn out in storage happens when the greens are packed too tightly together. While they are small and containers can easily fit hundreds of them, it is important not to pack them down too hard. There should be a looseness between layers of greens. This allows them to air out their natural moisture without sticking to each other and causing damage.
Microgreens packed too tightly can also cause bruising, which will result in them going bad sooner. These crops should always be handled with care and should be stored gently. A good rule to follow is to leave some space at the top of the container rather than filling to the brim.
Another important aspect to keep in mind is leaving enough room within the fridge itself. If microgreens are kept in a box-type container, they are relatively safe from surrounding items. However, if kept in bags, the greens can accidentally be squished by other products in the fridge. An excellent way to prevent this is to designate an area specifically for the microgreens, so everyone in the household knows not to place items in that area.
Growing Microgreens at Home
Microgreens are regarded as a very easy crop to grow at home. The plants are known for having a high yield to space ratio. This means even small planters and pots can produce large amounts of greens. They are a highly recommended plant for even amateur gardeners.
Home growing is also a great way to cut down on grocery costs. Due to increasingly high demand, store-bought microgreens are often expensive. With homegrown plants, the costs are cut considerably, and you can produce much larger amounts compared to the amounts available for purchase.
Luckily for any beginners out there, there are many grow kits available for purchase. Alternatively, a small square foot tray with drainage holes can be used to plant microgreens. The depth of the tray only needs to be between 1 – 3 inches thick, as microgreens do not require very deep soil.
Additionally, microgreens require large amounts of light, but both natural sunlight and fluorescent indoor light work. For indoor light, they should receive at least 12 – 16 hours per day, although 24-hour light is acceptable as well. Microgreens grown outdoors should be grown in the warmer months and typically do better with consistent but shaded sunlight.
Home Growing Provides Fresher Microgreens
The most significant benefit of growing your own microgreens is that you will have access to much fresher crops. With store-bought greens, they may be several days old. This diminishes the nutritional value and flavor and makes them last for shorter periods of time.
Moreover, unless you buy the more expensive organic crops, it can be hard to know what chemicals or fertilizers were used in the growing process. By home growing, you have total control over the production of your microgreens.
An additional benefit is that if you have the space to grow a lot of microgreens, you can even consider selling them. Local farmer’s markets are a great place to consider selling your crops and can be a good side source of income. You can also reach out to restaurants that locally-source their food and produce.
Minimal Space and Effort
As mentioned, microgreens require very little space to be grown in. This makes them an excellent crop for even the smallest homes or apartments. Small trays can be placed on shelves, counters, tables, and windowsills.
Because they can grow efficiently with artificial grow lights, microgreens take very little attention to how much light they are getting. Thus, you can leave them for hours, and as long as their light is on, they will continue to thrive.
It is important to note that you will need an actual grow light, as ceiling lights and regular lamps will typically not have enough fluorescent power. Here’s an example of a full grow kit with lights included for $35.
As far as watering goes, if you are using soil to grow your microgreens, a good rule to follow is water after one to two days, or whenever the soil feels almost dry. Observing your crops is also a great way to know when to water. If your plants are looking droopy, it may be time for hydration.
Alternatively, you can also grow using a hydroponic system. This system relies on water and the addition of nutrients to the water, rather than soil. Typically, the roots dangle in the water while the crops grow out of the water. This system is excellent for small, compact areas that may not usually be suitable environments for gardening. However, this system can also be more expensive, comparatively.
Easy to Harvest
One of the best parts of homegrown microgreens is they are super easy to harvest. There are, of course, a few aspects of harvesting to keep in mind. According to Chef Steps, it is essential to use very sharp scissors or knives to prevent damage or bruising to the crop.
Microgreens can typically be harvested every two to three weeks. Once you observe the first leaves have fully formed, it is probably a good time to harvest. Another way to determine if the crops are harvest-ready is to taste test. Cut a few leaves off and give them a chew – if the flavor is what your desire, go ahead and harvest.
As for how much of the plant to harvest, typically growers cut a little bit about soil level and take the entire crop. However, you can also do minimal harvesting, where you only cut a few inches off the top. Minimal harvesting may be preferable for the first harvest, as the plants may still be adjusting to their environment.
Benefits of Microgreens
Microgreens have grown in popularity mainly in thanks to their enormous nutritional value. As mentioned, many microgreens hold more nutrients than the actual adult plants. The plants are harvested after the germination period, meaning the nutrients needed to grow are condensed in a smaller space.
According to an article from WebMD:
“Researchers found microgreens like red cabbage, cilantro, and radish contain up to 40 times higher levels of vital nutrients than their mature counterparts.”
Good Source of Vitamins and Nutrients
Microgreens are rich in vitamins and essential nutrients. Vitamins found in microgreens include Vitamin A, Vitamin E, Vitamin K, Vitamin C, lutein, and beta-carotene. These vitamins are crucial for your body’s health, particularly your skin and eyes.
Microgreens are also a tremendous source of nutrients. They are typically high in potassium, iron, zinc, magnesium, and copper. Adding microgreens to a well-balanced diet is a great way to ensure you are getting all the nutrition your body needs. Plus, their addition to a diet can also help people with vitamin or nutrient deficiencies.
They Come in Many Varieties
According to Healthline, the most popular varieties of microgreens include crops from six families of plants. The list of crops includes cauliflower, broccoli, cabbage, radish, arugula, lettuce, dill, carrot, garlic, onion, leek, swiss chard, beet, spinach, cucumber, and squash. Besides these, there are many more crops that can be grown as microgreens.
Different varieties yield different levels of vitamins and nutrients. For instance, radish sprouts and wheatgrass are considered some of the most nutrient-dense among the microgreen varieties.
According to Back to the Roots, radish sprouts contain vitamins A, B, C, E, and K, calcium, iron, magnesium, phosphorus, potassium, and zinc, and wheatgrass includes vitamins A, B complex, C, and E, iron, zinc, magnesium, potassium, phosphorus, calcium, and selenium.
Can Reduce Risk of Disease
Another fantastic benefit to the nutrients of microgreens is their ability to reduce the risk of disease, including Alzheimer’s, Diabetes, Heart Disease, and even cancer. The antioxidants found in the plants significantly boost a person’s immune system and overall health.
It is essential to keep in mind that while microgreens can undoubtedly reduce risk, it is always best to consult with a doctor to treat medical conditions properly. Research is still out about how effective the crops are, but they certainly make a great addition to a healthy diet.
Final Thoughts
It is super easy to keep your microgreens fresh and healthy. Remember to always store in air-tight containers, keep moisture at low levels, and refrigerate at 40 degrees Fahrenheit. If you’re feeling adventurous, take it a step further and try your hand at home growing some delicious crops of your own!