If you’d like to grow your own microgreens, you must know about watering microgreens for paramount. This article will help you in all these aspects!
If you’d like to grow your own microgreens, knowing how much water to use is paramount. Too much or too little water can be a death sentence to these small plants. Fortunately, there are some simple steps you can take that will help you grow healthy plants packed full of nutrients.
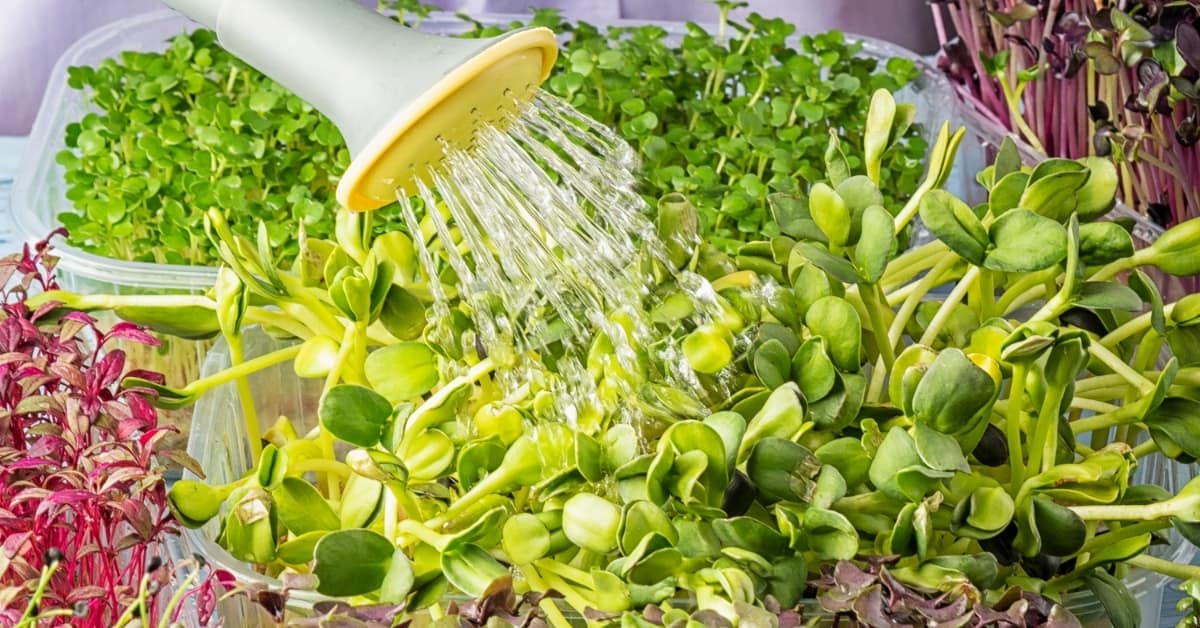
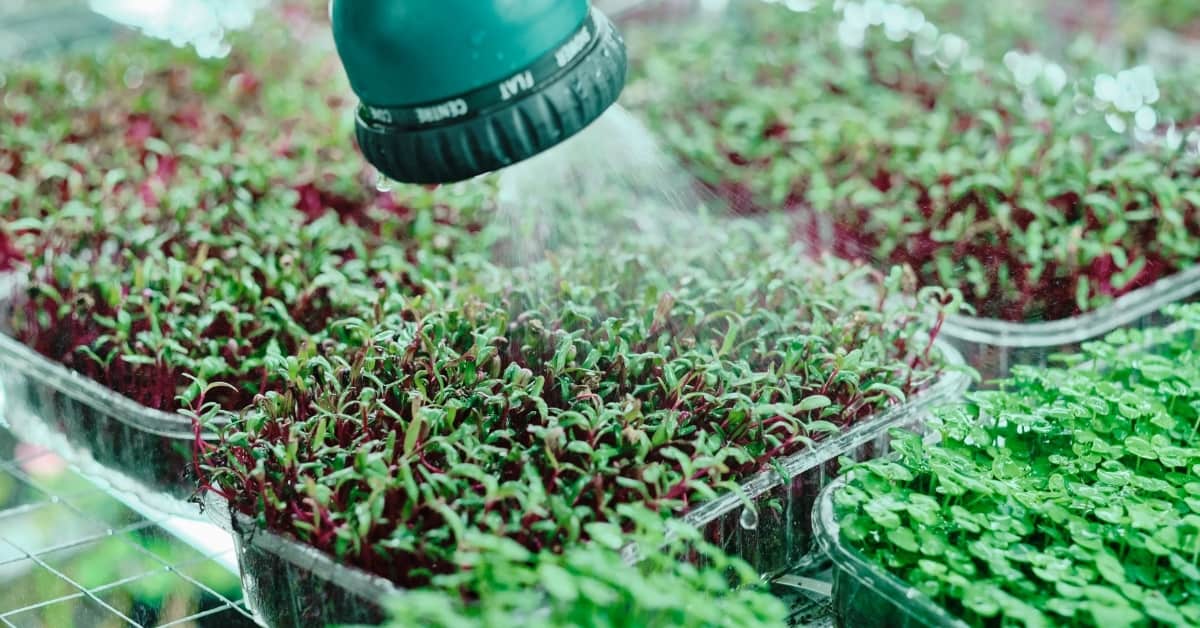
Most microgreens require watering every one to two days or when the soil begins to feel dry. How exactly you water your microgreens will depend on the method you’ve chosen to grow them. Whether you use soil or hydroponics, proper watering is the key behind microgreens that are both nutritious and delicious.
So, if you’re ready to start experiencing the nutritional benefits of microgreens and the satisfaction of knowing that you grew them yourself, you should keep on reading. In the next several sections, we will breakdown how to properly water your microgreens, how to avoid overwatering, and just about everything else you need to know to grow your own plants today!
The Right Water Quality for Microgreens
From the proper temperature to a safe Ph balance, the quality of your water is vital when you’re trying to grow the best microgreens. Water quality affects not only the growth of the greens but their taste as well.
While you can use tap water on your microgreens, taking the extra step to monitor the water you’re using more closely can lead to plants that are just better. Below is a list of elements you’ll want to keep in mind when picking and/or preparing the right water.
- Water ph level: If you want the best results, you should seek out water with a neutral ph balance. To test the ph balance of your water, all you need is a testing strip, which can easily be acquired online. It is best if the ph balance is between 6 and 6.5. You can lower the ph of water with a tiny bit of baking soda; likewise, you can increase its acidity with drops of lemon juice.
- Temperature: You never want to water your microgreens with water that is either too hot or too cold. The right temperature for the best results is somewhere between 50°F to 60°F. Once you get a feel for it, you can estimate how hot or cold the water is.
- Chlorine levels: There are usually small amounts of chlorine added to tap water to kill bacteria. Unfortunately, this chlorine can alter the taste of your microgreens if you use it. You can get around this by using a filter or letting the water sit out for a day. If it sits out long enough, the chlorine will evaporate before the rest of the water.
- Hardness: Some tap water has extra nutrients in it that cause it to “harden.” Hardened water is the white that you see over the inside of a tea kettle that hasn’t been used in a few hours or a day, and it is caused by calcium and magnesium carbonite. If your water does this, there is no need to fear as harder water is actually better for microgreens with all the extra nutrients that it contains.
Methods of Growing
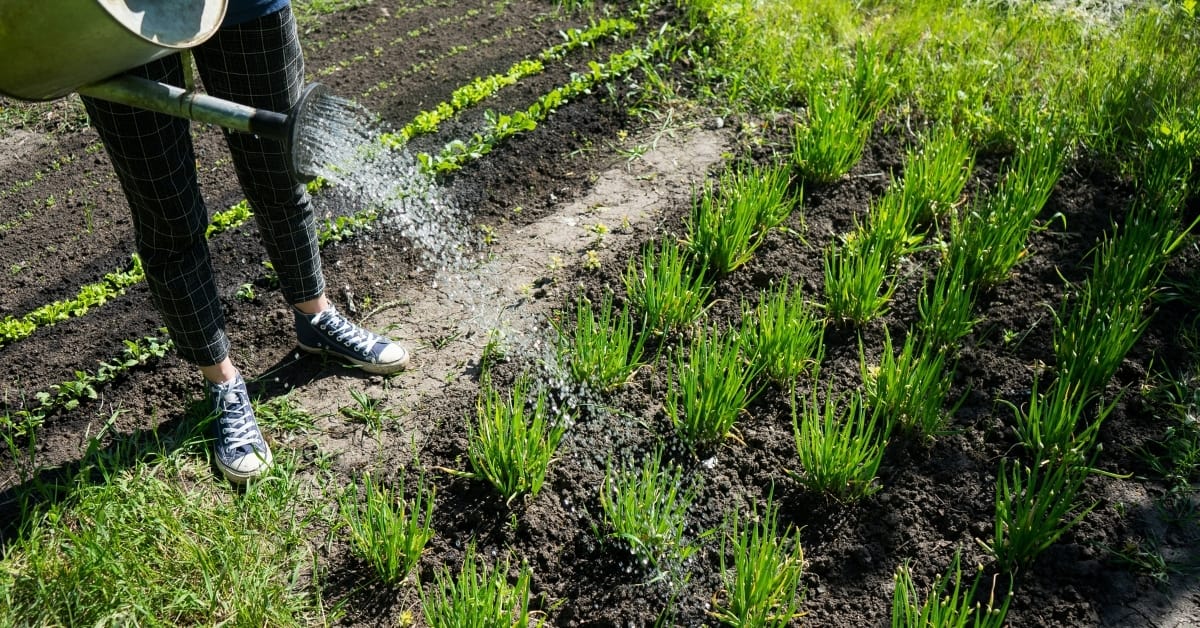
There are two primary methods used to grow microgreens. One way is through a hydroponic setup, while the other is in organic soil. You’ll want to understand the differences between these two methods before you look at how they work.
- Hydroponic Method: Hydroponics use mineral and nutrient solutions in water to grow plants instead of traditional soil setups. Hydroponics have growing pads instead of a mix that must always be kept damp with the nutrient-rich water. Similar to the potting mix with soil, the hydroponic pads should always maintain some level of wetness.
- Growing in Soil: This is the easiest and most traditional way to grow your microgreens. You’ll want to use an organic potting mix and a shallow container with holes in the bottom. The soil should never be soaked in water, but should almost always have some degree of dampness to it.
How Often Should I Water My Microgreens?
Now that you know all about the quality of water and different methods you can use, you’re probably wondering how often you should water your microgreens. We’ve got you covered. Generally, you will water your plants anytime they are too dry.
There are several methods to make sure your plants receive the right amount of water. Below we will break down some tips to help keep the water level good in soil and hydroponics.
Soil
- The first watering may happen earlier than you would suspect. You start the watering process before you even plant the seed in the soil. If you have larger seeds (you can skip this step for small seeds), pre-soak them in water overnight.
- Ensure you’re using the correct container. For your watering to be most effective, you’ll want to make sure that you have a container that is shallow with drainage holes in the bottom. These drainage holes are what allow excess water to drain.
- Use the best soil for microgreens. In the same way that the container you use can optimize the watering process, the right soil can too. The best soils for microgreens tend to be in organic potting mixes.
- Water your microgreens at the correct intervals. Most microgreens are going to need to be watered every one to two days, whether you are using the hydroponic or traditional soil method. However, if your pad or soil is already wet, you mustn’t add more water to it until later. This can lead to overwatering, which we will discuss in a different section.
- Keep the soil damp. The soil should always maintain a level of dampness to ensure that the plants are adequately hydrated.
- Even if it isn’t in the aforementioned intervals of watering, if you notice that the soil or pad your microgreens are growing in has become dry, itis time to add some more water.
Hydroponics
- Never pour water directly on the growing pads. Instead, you should ensure that you apply the water through the areas between the growing pad and the edges of the container. This can help prevent overwatering.
- Use the appropriate container: Make sure that your seeds have enough space and that they won’t be drowned in the container you use to hold your growing pads. This is for the same reasons you use the proper container for the soil method.
- Keep your growing pads damp. Like with soil, you’ll want your growing pads to remain moist at all times to ensure that your microgreens are being adequately hydrated. Too much or too little water can either destroy or reduce the quality of your microgreens.
The Risks of Underwatering or Overwatering Your Microgreens
You always want to make sure that you use the right amount of water. Below is a brief description of the risks you are running if you under or over water your plants.
Underwatering: Like all plants, if microgreens do not get enough water, they will lilt and die. Further, if microgreens do not get enough water in the germination period, they may not grow at all or grow weak and lack the nutrients they otherwise would have.
Overwatering: Because of increased moisture from overwatering your microgreens, you can end up having problems with mold that you wouldn’t typically have. Your microgreens can also begin to rot if they are too wet.
More Tips to Avoid Overwatering
Now that we know the risks involved in overwatering your plants, we can briefly run through some more easy ways you can avoid those issues. Below are a few more tips you can use to help ensure that you don’t end up overwatering your plants.
- Have a watering schedule, but remember to remain flexible. While it is a good idea to have a regular watering schedule that runs every one to two days, you should bear in mind that when your plant needs water, it needs water. If you notice that the soil or growing pad your microgreens are growing from is dry, you should add water. Likewise, even if you’d ordinarily water your greens at a specific time if they’re already damp, don’t.
- Check the soil or growing pad you are using often. Especially when you’re first starting to grow microgreens, you should check your soil or growing pad as much as you can to make sure that you are giving enough water. The more you work with microgreens, however, the more you’ll have a feel for when they’re likely in need of water.
- If you notice the microgreens are growing unevenly, make sure they are getting an even amount of water. Sometimes microgreens can be grown on an uneven surface that causes the water to settle on one side of the container. This can have the effect of drawing one-half of your microgreens while leaving little to no water for the other half.
Reasons to Consider Bottom Watering Your Microgreens
You’ll hear a lot of microgreen connoisseurs tell you that one of the best ways to water them is through a process called “bottom watering.” Just as the name implies, bottom watering is when you water your microgreens from below, usually with a tray.
If you would like an even easier way of watering your microgreens, you might consider buying a bottom watering kit today. Below is a list of benefits that come with bottom watering instead of the traditional method.
- Reduces risk of over or underwatering: When you use soil, there is always a chance that moisture will build up inside it and end up overwatering or underwatering your plants. With bottom watering, you can make sure your plants always get just the right amount of water.
- Reduces risk of mold: Mold arises due to moisture. When you practice bottom watering, you’re keeping all the moisture near the root system, thus reducing the amount on the surface of the plants that would lead to mold.
- Reduces the amount of time you need to water: When you water your microgreens the traditional way, you’ll probably end up watering them every day or two. With bottom watering, however, you can sometimes go for days without having to refill the water in your bottom tray. With that extra bit of time, you can read more articles like this to raise your microgreen growing game to even higher levels.
- More evenly waters your plants: Sometimes, when you water from the top, some of the water doesn’t make it past the stems, leaves, and soil to get down to the roots. Because bottom watering starts at the roots, your plants will always be evenly watered.
Warning Signs that Your Plant has Problems
Problem plants can occur from time to time. Usually, when a plant has problems, it is due to the environment or the method the grower is using. Below is a list of some of the most common issues microgreen plants have, with a brief description of what they are and what causes them.
- Slowed Germination: The average germination period for microgreens is around two to four days. If your seeds are slow to germinate, it is a sign that they are not hydrated enough. You should add more water or to your tray or try a different method to germinate the seeds.
- Mold: Mold and fungus can very quickly expand and take over all of your plants. Usually, if you’re seeing mold around your plants, it is a sign that you should clean your tray. It also can mean that your plants are in too humid an area or that you should have less seed density. You should consider which is most likely for you.
- Rot: Sometimes, the stem and even the roots can begin to rot. This is another issue that can be caused by increased temperatures and humidity. It’s also a sign that your plant does not have enough ventilation. It is important to deal with this problem quickly if you encounter it.
- Weakened Plants: Improperly watering your plants can lead to them becoming weakened. They can also be weakened if you take off your blackout dome in the wrong timing. This is why you should always make sure the soil around your plants is damp, and you should be precise when using the blackout dome at the beginning of the growing process.
- Yellow Coloring: Early on, when your plants are still under the blackout dome, this is normal. However, later if your plants are yellow, it is a sign they are not receiving enough light. If you can get your microgreens a more potent light source or move them somewhere they will receive more light, the problem should resolve on its own.
- Uneven or Clumpy Growth: Sometimes, you’ll notice that your microgreens on one side of a tray are much taller than the ones on the other side or that there’s more growth on one side than the other. This can be caused by either not enough sunlight hitting the plants on one side or an uneven surface for the tray, making the water run in one direction.
How to Save a Dying Plant
So let’s say your plant isn’t looking so hot. You’ll probably be wondering if there is a way you can bring it back to full health. Well, it depends on what the problem is.
- Find out what the problem is. This is really why you want to be monitoring your plants regularly. Sometimes with a problem, like mold, for example, if you catch it early, you can do something about it, whereas once it gets bad enough, you’ll have to start over.
- Research the problem to make sure that it is reversible. The internet is a wonderful thing. If you’re having trouble while growing your microgreens, chances are someone has had that same problem. A quick google search will have you one step closer to getting your plants back on track or knowing for sure that it is time to start over.
- Take the necessary steps to address the problem. Sometimes this will merely be moving your greens into a place with better light, while other times, it will be a more drastic action like changing the kind of soil you use.
So, How Exactly Do You Water Microgreens?
How you water your microgreens may vary by the method you are using to grow them and which ones you are growing. However, generally, you will begin by germinating your seeds, then watering the plant every one to two days.
Always remember the most important thing is that the soil or pads you’re using to grow your microgreens remains hydrated and damp. If you notice things are getting dry, you should water your plants again no matter when you had last watered them. If you apply some of this basic knowledge and your common sense, your microgreens will grow just fine!