Microgreens are one of the easiest types of vegetables you can grow at home, but many people are unfamiliar with how to grow microgreens at home. Microgreens often have equal or better nutritional profiles than their full-sized vegetable cousins and can be grown in a fraction of the time.
Microgreens are the immature versions of many common cultivars of vegetables such as broccoli, beetroot, and various salad greens. Microgreens are often grown indoors since they need less direct sunlight than full-sized vegetable crops, and most microgreens can be harvested in three weeks or less.
Microgreens may seem intimidating to someone who hasn’t grown them since they’re often featured in high-end cuisine and local food movements. Still, these little vegetables are even easier to grow in your garden than regular ones. Keep reading to learn more about how to grow and harvest your first crop of microgreens.
What to Expect When You Grow Microgreens for the First Time
Even if you’re experienced with gardening outdoors in a regular vegetable garden, microgreens can be a very different gardening experience.
Here are some of the ways that growing microgreens differs from growing vegetables in an outdoor plot:
- Indoor gardening: Because of their small size and because it is easier to grow and harvest microgreens indoors where they aren’t susceptible to contamination or insect damage, many microgreens are kept exclusively in indoor gardens. This makes them an excellent option for gardeners who are restricted to apartment living or otherwise don’t have a yard to work with when it comes to gardening.
- Soil-based or soil-less systems: While microgreens can be grown in trays of seed starter mix as a soil medium, it’s also possible to grow microgreens in either hydroponic or aeroponic systems to cut back on the amount of dirt, water, and mess associated with gardening indoors.
- Rapid growth: Many full-sized vegetables can take up to 3 months before harvest is possible, but most microgreens can be harvested in less than three weeks. As a result, if you set up a rotating microgreens system, you can have access to fresh vegetables year-round if you grow microgreens indoors.
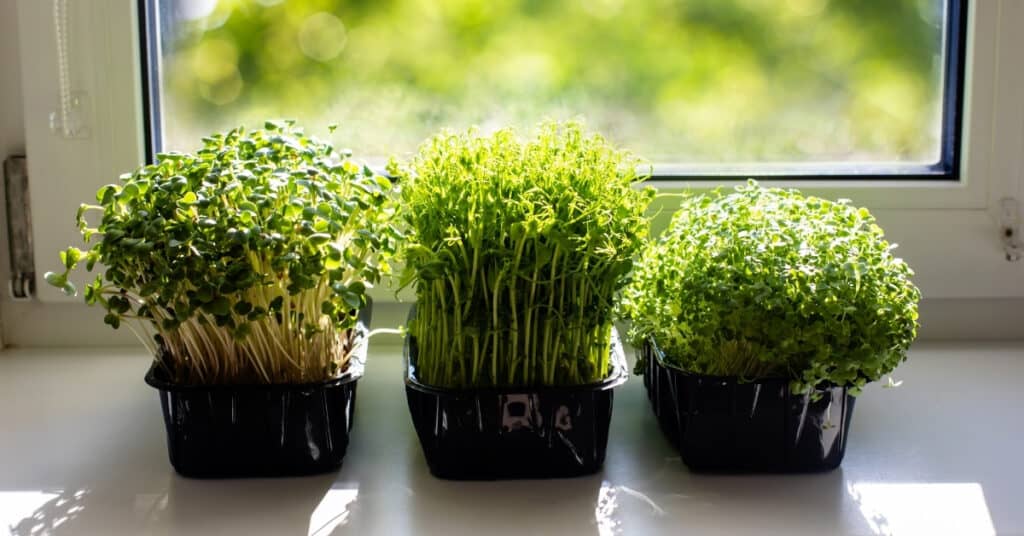
- Wide variety: There are many different cultivars and species of microgreens from pea shoots to beetroot greens, and each of them has a slightly different texture, flavor, color, and visual presentation. This makes them a great addition to many different meals, from salads and sandwiches to soups and roasted meats.
- Cut and come away: While microgreens can be harvested all at once, another way to gather them is to harvest them a little at a time as you need them. This makes microgreens perfect for a small kitchen garden where they can be used a little at a time. Sometimes this is an easier harvest method for small amounts of microgreens since they do not store well once cut.
- Culinary value: Not only can microgreens add nutritional value to any dish you add them to, but they can also help make your homemade meals more colorful and give softer dishes a crunchy, refreshing texture.
- Side business: Many home gardeners who grow microgreens have been able to sell their microgreens in local niche markets, either through a farmer’s market or through local restaurants who seek out seasonal microgreens for fresh garnishes. With a strong sense of organization, it’s possible to make enough selling microgreens to allow the hobby to pay for itself.
As you can see, there are many benefits that you can expect to take advantage of when you get started growing microgreens. Because they can be harvested so early, it’s easy for you to try several different varieties until you find one or two that you enjoy growing and eating.
How Long Does It Take to Grow Microgreens?
The short growing period of microgreens is one of the best things about them. While the optimal harvest time for each microgreen depends on the individual species or cultivar, most microgreens are very forgiving when it comes to the best time to harvest them.
As long as the microgreens have enough time to develop their true leaves, they will have enough flavor to work in cooking or garnish applications.
To find out the best time to harvest microgreens, you have a few different options:
- Visual inspection: You can usually tell when microgreens are ready to harvest just by observing the plants. Once microgreens have grown beyond their seed leaves and begin to develop true leaves, they are ready for harvest. The microgreen’s true leaves are those that most closely resemble their foliage as adult plants rather than the rounded “seed leaves,” called cotyledons.
- Days to harvest: For most microgreens, you should be able to find the days of harvest, which is the optimal number of days from the time the seeds germinate to the point that they can be harvested.
It’s easy to tell the perfect time to harvest your microgreens using either of these methods no matter what cultivar you’re growing.
Supplies Needed for Growing Microgreens
Microgreens don’t take up a lot of room while growing, and they don’t require extensive supplies either. You only need a few things to germinate and grow microgreens indoors successfully.
Here are the things you need to grow microgreens inside:
- A sunny windowsill: As long as you have a windowsill that gets plenty of indirect sunss, you should be able to grow microgreens indoors without additional lights. Microgreens are harvested before they reach a size when they need lots of light for growing energy. So, as long as the microgreen seeds have enough light and warmth to germinate, you should be able to harvest a crop from them.
- Microgreen seeds: You can purchase microgreen seeds either as individual cultivar (such as a beetroot microgreen) or as a microgreen mix. Many microgreen salad greens come mixed so that cut-and-come-away salad mixes can be cultivated in the kitchen garden.
- A tray with drainage: The planting trays used to start seeds for outdoor gardening are usually adequate for growing a crop of microgreens to harvest since these greens don’t take up very much space. Choosing a tray with drainage is important since microgreens can drown and die off if the soil remains too wet.
- A spill tray: Since the microgreen tray has drainage holes in it, you’ll want to put another tray underneath it to catch any water that runs through the soil media. This is especially important with a seed starter mix since it tends to be friable and allows water to pass through it easily.
- Seed starting mix or soil-less media: Seed starting mixes help encourage germination by providing seeds with all of the nutrients they need to germinate quickly. For those who would prefer to use a hydroponic or aeroponic system, soil-less media are also available.
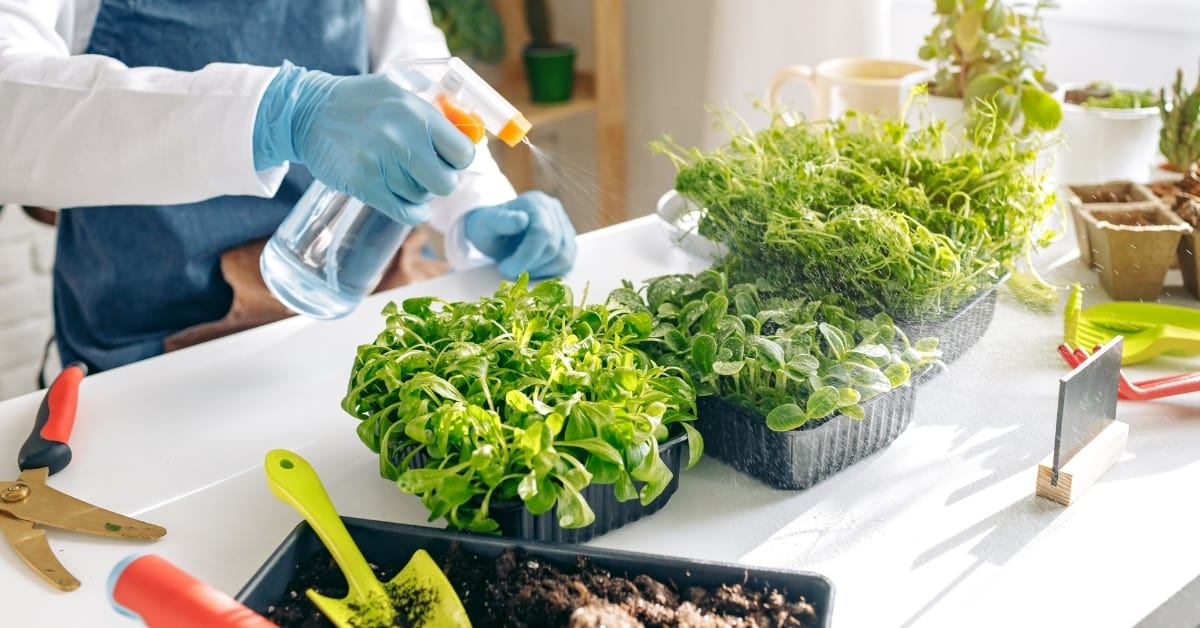
- A spray bottle: Spray bottles are used for misting your microgreens to water them since this can cause the soil to become less saturated and helps keep the foliage of the new sprouts from drying out. This is especially important for indoor gardens where dehumidifiers or air conditioning are used, as these can draw moisture out of the air.
- Labels (if planting more than one type of microgreen at once): Labels are useful when growing microgreens, so you know which kinds of microgreen you have planted. You can also mark down the expected date of harvest on them, so you know the perfect day to pick them and swap them out for a new tray.
- Additional lighting (optional): If you want to grow microgreens indoors, but you don’t have access to a sunny window, you can still accomplish it by growing microgreens under some supplemental lighting. With additional lighting, you can grow microgreens anywhere in your home, not just at a windowsill.
- Warming mat: Some seeds germinate better at a slightly higher soil temperature, so to emulate thawing spring temperatures, a gardener’s warming mat can be placed underneath the spill tray to help radiate heat up into the microgreen seed tray from the bottom, helping encourage slow-starting seeds to germinate faster.
If you have the above supplies, you are ready to get started growing microgreens. Once the lighting and watering needs of the microgreen seeds are taken care of, it doesn’t take very long for most varieties to germinate and start sprouting.
How Many Microgreens Can You Grow?
The number of microgreens you can grow is limited only by your growing space and your budget. Since most microgreens are ready within 14-21 days at the latest, you can potentially harvest twelve crops or more of microgreens out of a single tray a year. And that’s only one tray!
Because it’s relatively easy to grow microgreens in bulk, many gardeners have turned to cultivating microgreens as an easy way to make some money on the side by selling their microgreens at a farmer’s market or by selling them directly to local restaurants.
The number of microgreens you can grow can be significantly increased if you decide to grow microgreens with artificial lighting as well as relying on natural light:
- If you use natural light only to grow your microgreens, you will be restricted in how many microgreens you can grow by the number of sunny windows in your home.
- However, if you grow them with artificial light, you could devote an entire room of your house to growing microgreens if you wanted to.
How Many Microgreens Do You Need?
How many microgreens you need to grow depends on:
- How many microgreens you intend to eat
- How many microgreens you intend to sell
If you plan on making money with your microgreens as a side business, you’ll need to grow enough to sell in bulk.
The amount of microgreen seeds you buy depends on the size of the container you plan to grow them in. Here’s a quick guide for how many seeds to buy based on the size of your seed tray:
| Container Size | Amount of Microgreen Seeds Needed |
|---|---|
| Three inches by six inches | 1 tablespoon of seeds |
| Four inches by eight inches | 2 tablespoons of seeds |
| Six inches by eight inches | 3 tablespoons of seeds |
| Four-inch round container | 2 teaspoons of seeds |
| Six-inch round container | 2 tablespoons of seeds |
| Ten-inch round container | 2 tablespoons of seeds |
How Often Should You Set Up New Microgreens?
How often you “reset” your microgreens throughout the year depends on how many microgreens you want to have available and whether you want to harvest them all at once or harvest them a little at a time.
- If you plan on harvesting microgreens a little at a time for kitchen garnishes and salads, then you should probably limit resetting your microgreen trays to once a month after the majority of the greens have been clipped away.
- If you’re growing microgreens for the market, you should try to harvest all of the microgreens in the tray around the two-week mark so that the second crop of microgreens can be reused and two crops can be grown in the same month. This can double your harvest of microgreens for the year but also necessitates harvesting microgreens all at once.
If you don’t already have plans for using your microgreens, this can lead to food waste since microgreens do not keep well after being cut, especially if they’re washed.
How to Set Up A Microgreen Tray
Setting up a microgreen tray couldn’t be a more straightforward operation. To get started, perform the following:
- Set up a spill tray on a sunny windowsill or beneath artificial grow lights. If you’re using a seed-warming mat, place it down before putting down your microgreen tray.
- Place the microgreen tray inside of the spill tray.
- Fill the microgreen tray with a seed-starting medium.
- Sprinkle seeds on the top of the seed-starting medium until they are evenly dispersed across the entire container
- Take the spray bottle, fill it with distilled water, and spray the seed tray thoroughly to moisten the soil.
- Water seed trays every day at least twice to maintain moisture levels until germination.
Once you have your microgreens sown and watered, you need to ensure that they maintain consistent moisture levels through regular watering until the seeds have a chance to germinate. If the seeds are allowed to dry out after being activated by water and light, it will kill them.
How to Harvest Microgreens
Once your microgreen crop is ready to harvest, collecting your microgreens is easy. Microgreens can be harvested by taking a pair of sharp, clean scissors and cutting the microgreens you want to harvest down to about a half-inch above the soil line.
Microgreens that are stored in the fridge in an airtight back can last for one to two weeks. Once microgreens are washed, they can deteriorate much more quickly, so storing microgreens unwashed is the preferred method. Microgreens can still be washed and dried before culinary use.
What to Do with a Used Microgreen Tray
After you harvest your microgreens, you should be left with a tray full of chopped off stems and root systems. These discarded roots systems make great compost for your next set of microgreen seeds.
An excellent way to recycle the seed-starting mix that you’ve already grown microgreens in is to flip the microgreen tray completely over. This will dump any cut roots and stems into the bottom of the tray under the soil where they can decompose more quickly while leaving the top of the soil bare for new seeds to be sown.
If you don’t want to reuse the soil in your microgreen tray after a crop of microgreens has been harvested, you can dump the used soil into your garden and start with a fresh tray. But by flipping your microgreen tray, you can get at least two uses out of one tray of soil. Since the seed-starting mix isn’t cheap, this can help you save money on your microgreens investment.
Microgreen trays can be washed out and reused repeatedly, and they can also be sterilized to prevent the transfer of soilborne pathogens from one crop to the next. This is a significant advantage over in-the-ground gardening, where soilborne pathogens and crop rotation can be a serious hassle.
Microgreens Are Easy to Grow and Harvest at Home
Microgreens are one of the easiest vegetables you can grow and harvest at home since you don’t even need an outdoor gardening space to do it. The speed that microgreens grow is also a massive advantage for those who want to grow and eat more vegetables but don’t want to dedicate an entire season of the year to do it.
If you enjoy how to grow microgreens for home culinary use, you can also try growing them for a profit. Since they require fewer start-up materials and capital than other crops, they’re the perfect way to see if you have what it takes to generate produce for a stand, restaurant, or farmer’s market.