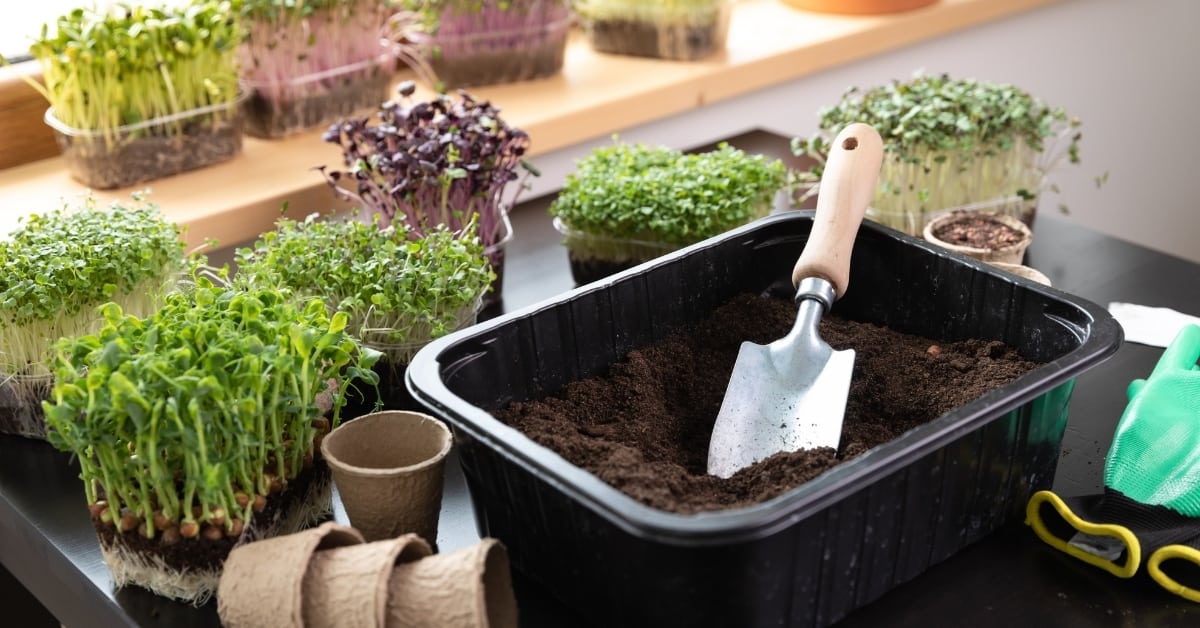
When it comes to growing vegetables, soil and plant nutrition are among the most important aspects of giving plants, everything they need to thrive. Microgreens need high-quality soil (or soil-less mix) because microgreens need to germinate and grow in a short amount of time.
A soil mix isn’t always necessary for microgreens if a soil-less media or fiber mat is used instead in a hydroponic system. Still, good soil for microgreens should be friable and contain high levels of nutrients to promote fast germination and growth for a faster harvest. The soil in microgreen trays can be reused for additional nutrients.
A healthy soil mix is crucial to success when it comes to growing microgreens. Read on to learn more about how soil nutrition impacts microgreen growth.
Good Soil Qualities for Microgreens
There are several qualities of good soil that are especially important when it comes to using the soil for microgreens.
Here are the qualities in soil that help positively impact microgreen growth (Source: Penn State Extension):
- High nutritional profile: Soil for germinating seeds into microgreens needs to be full of organic material and nutrients for plants to germinate and grow as quickly as possible.
- Friable soil: When soil is friable, it means that it breaks down easily in your hand, and it also means that water and other materials can pass easily through it. Friable soil is vital to making sure that plant roots systems don’t become either compacted or waterlogged.
- Sterile: Sterile soil will not contain the same soilborne pathogens that are found in native soil. These pathogens can attack vulnerable seedlings and cause die-offs, so using a sterile potting mix helps gardeners avoid those kinds of disease issues.
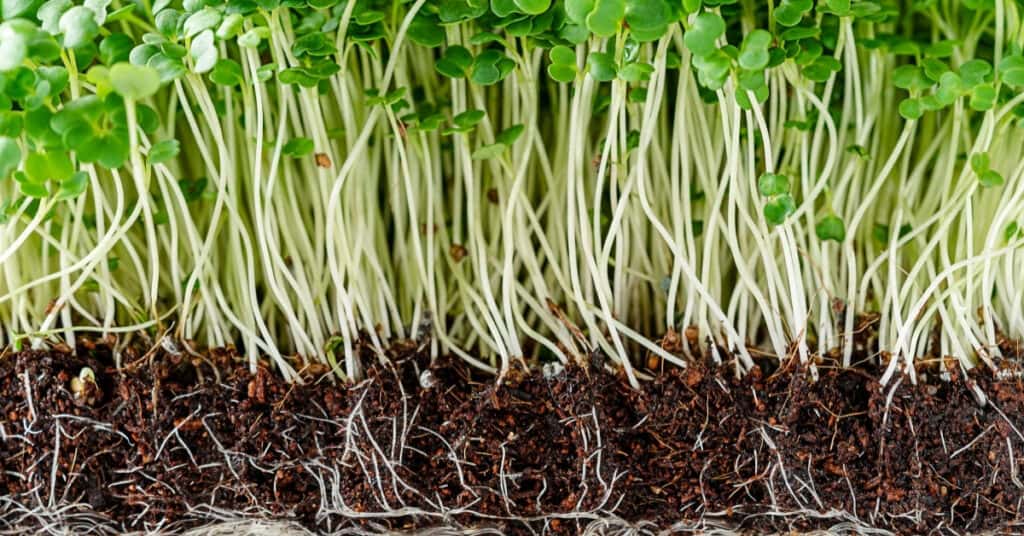
- Good depth: One of the significant advantages of microgreens is that they have a very shallow root system. They also grow out and are harvested so quickly that they never can develop a more complicated root system (and one that would need more space). Microgreens need at least an inch and a half to two inches of soil to establish a decent root system.
- No chemicals or fertilizers: There’s no reason to amend your microgreen soil with fertilizer or other soil amendments because the microgreen seedlings shouldn’t be spending enough time in the soil for fertilization to make a difference. After all, you don’t want to encourage the plants to put on fruit or flowers, just edible foliage.
- High water retention: Soil mixes used for growing microgreens must be able to retain water and remain moist for hours after the microgreens are watered since these seedlings are especially vulnerable to drying out due to their rapid growth and their indoor location where they are exposed to air conditioning and other dehumidifying elements.
- No insects: Another reason it’s a good idea not to use native soil for your microgreen seed trays is that native soil often contains insect eggs, larvae, and adult insects. These insects can kill off seedlings and can damage microgreens to the point that they aren’t palatable to eat anymore—nobody wants salad with many bug holes in it.
The above qualities can be achieved in a microgreen potting mix, whether you use a commercial seed starting mix or make up a homemade one.
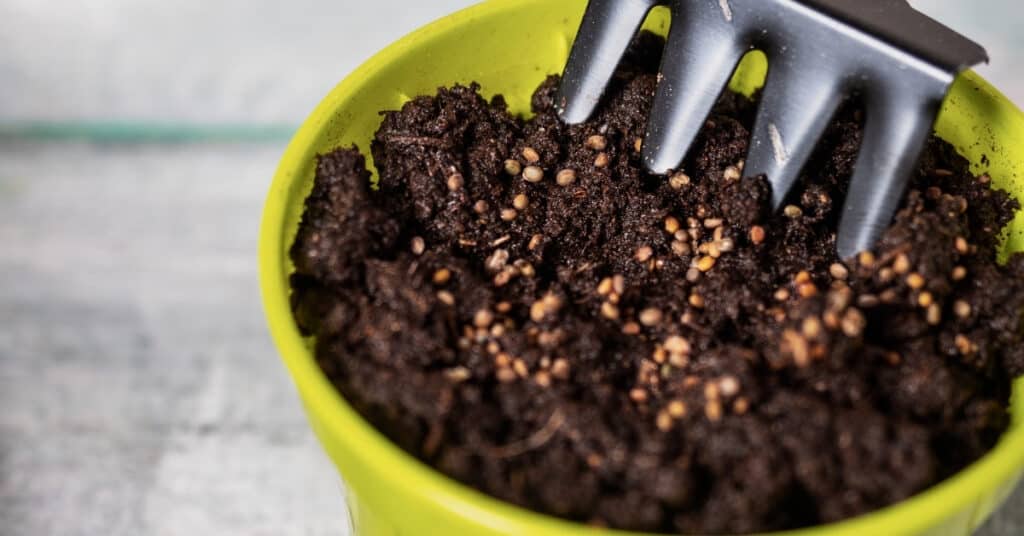
Components of Good Soil for Microgreens: Several different soil components make it a good match for growing microgreens. The trick to getting good germination and sprouting results with microgreens is providing microgreen seeds with a well-structured soil.
The best soil type for growing microgreens and other vegetables is considered granular soil since it is the soil type that is best for the formation of roots and taking up nutrients from the soil. Coarse soil is friable and will crumble easily in your hand.
The main components of the soil that microgreen gardeners have to worry about are nutrition and friability. Microgreen gardeners don’t have to worry about issues like soil depth since microgreens are harvested so early. They also don’t usually have to worry about native soil problems, such as aggregation compaction issues.
Good soil is made up of several different aspects. Here are some of the things that all soil needs to be compatible with thriving plant life:
- Minerals: Potting mix used for microgreens needs to contain essential plant minerals such as nitrogen to promote plant growth.
- Organic matter: Organic matter provides the highest level of nutrients in the soil and is usually included as a type of decaying plant matter such as mulched bark. Organic matter breaks down slowly in the soil but provides a long-release source of food for plants.
- Air: At least 25% of the soil should be comprised of air, as plants need to take oxygen through their root systems as well as nutrients. The need for air at a plant’s root system is the reason that compacted soils are damaging to plant growth.
- Water: Water that is held in the soil is used by plants to hydrate themselves and transport nutrients up through the stem and into the foliage, flowers, and fruit. Water is one of the essential soil components for microgreens since these tender greens will dry out and die quickly without constant access to it.
These four components are crucial for achieving a good soil composition that effectively cultivates quick-growing plants like microgreens.
Soil Mixes Versus Fiber Mats for Microgreens
Many gardeners grow microgreens in soil trays, and this is an easy enough way to achieve a good soil composition for your greens. The advantage of using a soil tray is that you have more control over the kind of soil that is going into the tray.
- If you need more friability in your soil, you can add perlite or some other additive to break the soil up.
- If you have a soil that needs more organic material, you can always add compost.
There is also an alternative to using soil for growing microgreens—soil-less mixes or fiber mats. Instead of soil, microgreens are just as easily grown in a fibrous material such as peat.
There are a couple of advantages to using soil-less fiber mats for growing microgreens versus using soil, such as the following:
- Less mess: One of the disadvantages of using plant trays with soil indoors is that they have the potential to make a mess. It’s straightforward for people to knock a tray of seedlings off of a windowsill accidentally, and even easier for a cat to do it for you. Using fiber or peat mats in a soil-less microgreen setup removes the risk of having soil spilled in your house.
- Less chance of mold: Some climates and environments are more prone to mold than others due to humidity or other factors. Bringing soil into the house in soil trays or planters can accidentally introduce mold into the household. Soil-less microgreen systems are much less prone to fungal infestation.
Commercial Soil Mixes Versus Homemade Soil Mixes
When choosing a soil to plant your microgreens in, you have two primary options to choose from:
- Homemade soil mixes: Homemade soil mixes can be created from a mixture of different commercial soil amendments or made up of native soil. Remember, it’s important that if native soil is used in a homemade soil mix, the soil is sterilized before use.
- Commercial soil mixes: There are soil mixes such as seed-starting mix formulated to provide the best nutritional profile to jumpstart germinating seeds. Commercial soil mixes are generally more expensive than using a homemade soil mix, but you have the advantage of being able to buy a retail mix that is tailored for starting seeds.
Both homemade soil mixes or commercial soil mixes can be used to grow microgreens; the one you prefer is just a matter of preference. While commercial soil mixes are costly compared to just getting some soil from your yard, they give you a lot more control over soil parameters, such as nutrients, pH, and other factors.
Needs of Microgreens Other Than Soil
Soil plays a vital role in microgreen nutrition, but they aren’t the only thing that microgreens need to grow well. There are a few other things you need to provide microgreens to get the most out of your harvest.
Here are some of the other things you need to supply to nourish microgreens other than good soil:
- Ventilation: Seedlings that don’t receive proper ventilation are more prone to die-offs from fungal or bacterial attacks, and ventilation also promotes strong stem structures that prevent seedlings from flopping over under their weight.
- Moisture: Microgreen seedlings are susceptible to drying out, and seeds must remain moist from when they are planted until they germinate to be viable. If they are allowed to dry out at any point before or after germinating, the plant will die.
- Warmth: While some microgreen species and cultivars germinate better at lower temperatures than higher ones, all microgreens require a specific temperature range to achieve optimal growing conditions.
- Light: Most microgreens can grow just fine in indirect light coming through a sunny window, making them a good option for indoor gardeners. However, those gardeners who do not have access to natural light from a window will need to use artificial lights for their seeds to germinate and grow.
If all these nutrients are provided along with a structured soil, your microgreens should grow efficiently.
Tips for Using Soil with Microgreens
Choosing the right soil and knowing how to take care of it can make a big difference in whether you succeed with your microgreen garden.
Follow these guidelines to get the most out of using soil to nourish your microgreens:
- Make sure that the soil you use is sterilized. Often commercial seed starting mixes already come pre-sterilized. Still, if you use native soil for your potting mix or make a homemade mix out of different potting soils, you’ll need to sterilize the soil before using it in your microgreen trays. This helps prevent any bacterial or fungal infections that can cause die-offs in your seedlings when they are most vulnerable.
- Mist the soil with a spray bottle instead of pouring water onto the soil. Pouring water directly onto the soil of your seed trays can disrupt your seeds, over-moisten your soil, and cause water to leak through the drainage holes in your seed tray (which can cause a major mess if you didn’t put a spill tray underneath).
- Soak microgreen seeds before planting them in the soil. Soaking microgreen seeds can make them viable for germination more quickly by softening the hard outer shell on the seed, allowing the seedling inside to break free more easily.
- Reuse your old microgreen roots. One of the advantages of using soil in a microgreen system is that you can flip the entire tray over and reseed the other side once you cut and harvest the microgreens. With the root systems left in the soil, the soil becomes a sort of fibrous mat that is perfect for germinating new seeds, and the decaying roots add nutrients back to the soil.
- Warm the soil to aid with germination. Many microgreen seeds may have difficulty germinating at the lower temperatures that people keep their home interiors at with an air conditioning unit, so if you keep your house cold, be sure to buy a warming mat to place under your microgreen seed trays so that the seeds receive the heat that they need to activate germination.
- Don’t overwater the soil. While it’s important to make sure that microgreens have a steady source of moisture in the soil to prevent them from drying out, the soil must not become waterlogged since this can suffocate the plants and cause root rot.
- Do not let the soil dry out. Do not let the soil dry out while your seeds are germinating. Microgreen seedlings are fragile enough to die quickly if deprived of moisture for just a day or two. Keep in mind that seed trays cannot retain moisture like the earth can, so you should spray down your seed tray about twice a day to ensure that the soil remains slightly damp.
- Make sure to label your soil trays. You should label soil trays with both the type of microgreen and the date of the expected harvest so that you always know what point in the growing cycle you are. This is especially important if you plan to mass grow microgreens as a side business since you’ll need to minimize the amount of down-time between crops to maximize your profit.
- Invest in a sharp pair of scissors. Cutting microgreens off at the soil line is the quickest and easiest way to harvest them when they’re ready. If you use your scissors to cut microgreens a little at a time, be sure to sterilize the scissors between cuttings to prevent disease spread between plants.
- Try a few different soil mixes until you find one that you have the most success with. There are many different seed starting mixes on the market, and some may be more compatible with your chosen microgreen cultivar than others. Experimenting is a good idea since microgreen crops mature so quickly, and you can eventually find a most suitable mix for you.
If you take these few steps to make both your seeds and your soil more viable during the planting process, you will end up with a much better crop of microgreens to harvest after only a few weeks.
Alternatives for Soil with Microgreens
Soil can be used to grow microgreens, but there are other ways to ensure that microgreens get the nutrients they need without using a soil-based system. Microgreens can also be grown on fibrous mats of material (such as peat) to grow them without using soil indoors.
Microgreens can grow just as well on fiber mats and in soil-less media as they can in soil, and there are many benefits of using a soil-less system for microgreens, such as the following:
- Less soil contamination of the greens: Growing salad greens in a soil-based system can lead to a lot of dirt and grit at the base of the greens that have to be carefully washed away. Soil-less systems don’t have a problem with this.
- Little threat of bacterial or fungal die-off: In comparison to soil-based systems, soil-less hydroponic systems are less susceptible to infections from bacteria or fungus. This leaves seedlings less vulnerable to disease.
- Superior water retention: Peat, coconut husk, and other fibrous media are better at retaining water than soil, which means that the seedlings are not as vulnerable to drying out. There is less risk of water spills and leaks.
- Easier harvesting: Microgreens planted in a soil-less system are very easy to harvest and require minimal cleaning.
There are many advantages to using a soil-less system versus using soil to nourish your microgreens. It’s worth trying to grow microgreens both ways to see which one is more productive since you can grow a crop of microgreens so quickly. Different types of microgreens may also do better in soil-based systems versus soil-less systems.
How to Sterilize Soil for Microgreens
In some cases, it can be advantageous to use native soil to germinate your microgreens, especially if you live in an area with rich, fertile soil. However, native soil and potting soil mixes that aren’t seed-starting mixes need to be sterilized before being used in microgreen trays. This helps prevent the spread of soilborne pathogens.
Soil can be easily sterilized by placing it in an oven for around 30 minutes at 180 degrees. This is enough time for any bacteria or fungus in the soil to be destroyed. (Source: Gardening Know How)
Sterilizing soil can also be done in the microwave or by steaming. Soil should be steamed in a water bath for thirty minutes or microwaved for two and a half minutes. It’s important to note that soil should not be heated longer than thirty minutes, which can encourage the build-up of chemical toxins.
The risk of not sterilizing the potting mix or native soil before using it in a seed starting mix is that disease can quickly sweep through the seed tray and kill your seedlings. This is a minor inconvenience if you’re just growing microgreens for home use, but it can be devastating if you are growing microgreens for a local market.
Best Commercial Soil Mixes for Microgreens
If you choose to go with a commercial soil mix to start the seeds for your microgreens, there are plenty of high-quality commercial soil mixes for seed-starting available on the market.
Here is a list of some of the best commercial seed-starting mixes you can get to help get a jumpstart on germinating your microgreen seeds:
- Organic Soil, Seed Starting Potting Mix, Green Seeding Soil Mix for Organic Ornamentals seedlings and cuttings, 2 Dry Quarts
- Miracle-Gro Seed Starting Potting Mix, 8-Quart
- Black Gold 1311002 16-Quart Seedling Mix
- Miracle-Gro 74978500 Seed Starting Potting Mix, 1 Pack
- Espoma Seed Starter Potting Mix, Natural & Organic Premium Potting Mix for Seedlings and Cuttings, 8 Quart
- Purple Cow Organics Seed Starter Mix, 12 Quart Bag
An excellent commercial seed-starting mix can take much of the guesswork out of trying to get your microgreen trays started since all you have to do is pull the dirt out of the bag and get going. You won’t have to worry about getting your soil structure proportions right or making sure the soil is sterile.
What is a Good Homemade Mix for Microgreens?
If you want to make your own microgreen soil mix, it doesn’t require a whole lot of ingredients.
Here are the necessary ingredients for a good microgreen mix:
- 3 parts coco-coir
- 1 part sand
- 1 part perlite
- 0.5-1 parts organic compost
This mixture provides a good mix of friability, moisture retention, and nutrients to give microgreens a good head start in growth.
Will Microgreens Grow into Full-Sized Vegetables?
Many gardeners who are new to microgreens may wonder if they can just grow full-sized vegetables from their microgreen seeds. Most microgreens will become stunted by their growing conditions in a shallow microgreen tray, which will keep them from achieving their full potential size. (Source: Quantum Microgreens)
You can allow microgreens to grow beyond the 2-3 weeks it takes them to get to microgreen harvesting size, but they will usually remain a small size. Since microgreens don’t bolt and deteriorate in a shallow microgreen tray in the same way they would if they were planted outside, microgreens can be cut and collected as long as they’re putting out fresh greens.
Microgreens such as pea shoots will not grow into full-sized vegetable plants because they will not receive enough direct sunlight or nutrients to put out proper flowers and fruit in an indoor microgreen setup.
Do Microgreens Need to Be Fertilized?
No, microgreens should not need to be fertilized as long as you planted your seeds in a seed-starting mix that contains organic material such as compost. Full-sized vegetables that are grown outdoors are fertilized to encourage them to produce flowers and fruit. Since microgreens are harvested well before this stage of the plant’s development, fertilization isn’t necessary.
As long as some organic material is added into your seed-starting mix to act as a nutritional backbone for the soil, adding additional fertilizer is a waste. It runs the risk of burning your plants.
Can You Reuse Your Microgreen Soil?
Yes! A significant benefit of growing microgreens in an indoor tray is that the soil can simply be turned over and reused when the greens have been harvested. This is an environmentally friendly way to collect crops repeatedly, and the soil doesn’t become depleted because the old root systems of the previous microgreen crops are re-added to the soil. (Source: Plant Hardware)
Eventually, once your microgreen soil has been reused several times, it may develop aggregates that cause it to become clotted and not as friable as it was, to begin with. At this point, it may be a good idea to recycle the soil mix into the garden and start with a fresh batch to ensure that seeds can germinate easily without getting hung up in the soil.
Using a Well-Balanced Seed Starting Soil is Key to a Bumper Microgreen Crop
Light and water are both critical for making sure that microgreen seeds germinate properly. Still, without a good soil foundation (or a soil-less media to provide moisture retention and nutrients), your microgreen seeds won’t get the nutrition they need to grow well.
Ensuring that you either put together a good seed starting mix or buy a reputable commercial mix can be the difference between success and failure with your microgreen harvest.