If you want a challenge as a gardener, you must learn, “will microgreens grow back after cutting”. For this purpose! We’ve got you covered in this article!
Microgreens have been a growing trend over the previous few years. Reasonably so, there are a lot of questions surrounding them. These tiny seed starts, just beyond the growing window of a sprout, take a lot of dedication and care. In the end, it only makes sense that we’d want to get a little bit more out of our labor, right? What happens to the microgreens after they have been harvested? Will they regrow?
Unfortunately, the reality is that very few microgreens regrow after cutting or trimming them. If that was not bad enough, those that can be regrown often result in minimal yields. Some examples of microgreens that can be regrown include:
- Peas
- Beans
- Kale
Re-growing your microgreens is a rather labor-intensive and tedious process and often yields far less than the first time around. Depending on your goal or purpose behind wanting to regrow your microgreens, you may want to consider other alternatives, which you can find towards the end of this article. However, if you want a challenge as a gardener, look no further! We’ve got you covered, too.
Do Microgreens Regrow After Cutting?
Very specific microgreens regrow after cutting or harvesting them. Most do not. The regrowing process is frequently a challenging process for little in return for those that do. The specific microgreens that regrow are as follows:
- Peas
- Green peas
- Snow peas
- Speckled peas
- Field peas
- Snap peas
- Chickpeas
- Beans
- Fava beans
- Kale
- Common Herbs
- Mint, Basil, Rosemary, Sage, Oregano
In general, these are microgreens in the Lamiaceae and Fabaceae families. In some cases, other microgreens may also regrow. The best way to find out is to try for yourself. Leave approximately one inch left on the shoot and the lowest leaf after harvest. Within about a week, you should see signs of regrowth. If you do, you may have a yield in the next few weeks.
Have you already tried the regrowth process, and it didn’t work out? There’s a variety of reasons you ran into issues, and hopefully, this article can help you. With the right knowledge and a little patience, you could start over and see improved results. The key is, you will need to start over either with a new batch you just harvested or from scratch.
Factors That Affect Microgreen Regrowth
The phrase “young and strong” only applies to a degree, and honestly, very little in the case of microgreens. Like an infant is susceptible to many illnesses, the microgreen (a stage of infancy in plant time) is also very vulnerable. Therefore, harvesting a plant and cutting it back severely – or at all – exposes it to many potential bacterial and fungal infections.
Unlike their slightly younger counterparts, sprouts, microgreens are grown in soil. Soil is known to harbor bacteria and can easily cause fungal infections in vulnerable plants. Microgreens fall into this category, particularly if they’ve been cut or trimmed. Doing so is akin to leaving a wound in the plant – an injury that takes a bit of time to heal (a band-aid won’t suffice) – and, in the meantime, leaves it at risk of developing an infection.
The rate at which the plant can do photosynthesis is also significantly reduced, meaning the regrowth of the plant will likely be stunted. In other words, the microgreens will not develop as fully as the initial batch resulting in a lower yield.
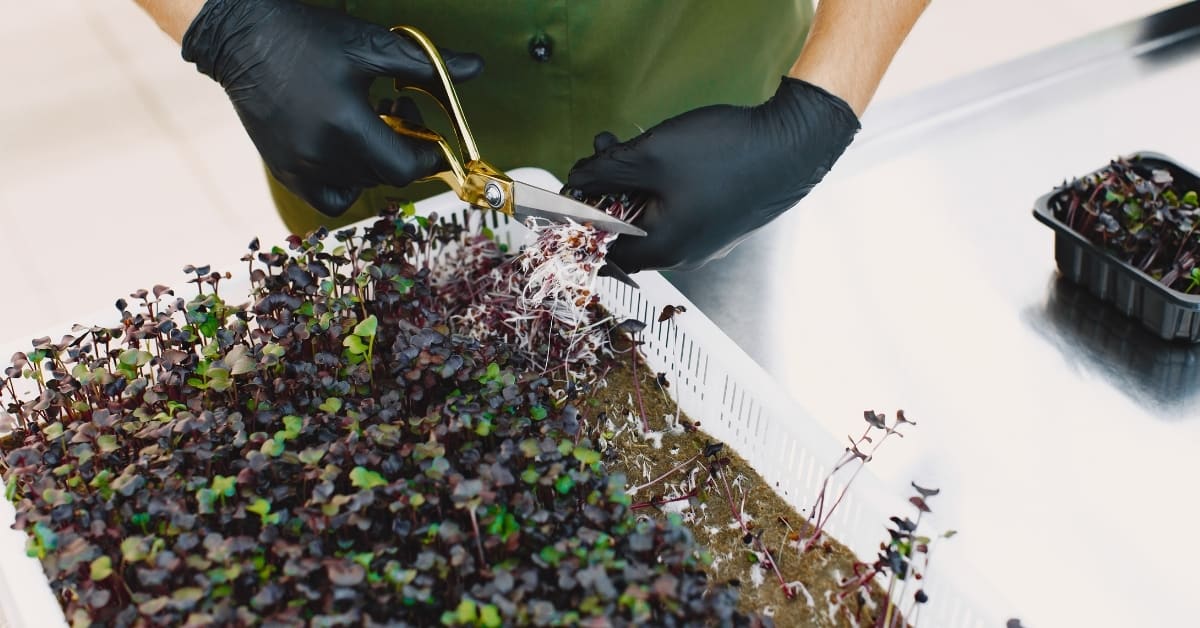
This article is incredibly helpful in explaining the importance of where you cut or trim your microgreen in order to maximize the chances of it regrowing. One important thing to note is the utensil you use to cut/trim. Whether it is a knife or scissors, make sure that the tool you use is clean to avoid potential infection due to harvesting. This is especially important when talking about regrowth.
How to Improve Chances of Microgreen Regrowth
There is no way to guarantee the regrowth of your microgreens. If there were, then we’d all be doing it. However, there are several ways that you can set your crop up for success, as much as is possible. Here are some quick tips to be mindful of if you are planning to attempt the regrowth process:
- Temperature: Be sure to maintain a warm environment with consistent temperatures between 60 – 70 degrees Fahrenheit (15.5 – 21.1 degrees Celsius)
- Moisture: Keep the soil moist (not overly dry or wet). This will also help to keep the soil warm.
- Light: Keep the microgreens out of direct sunlight, but do allow them consistent exposure to indirect light.
- Leaves: Don’t harvest all the leaves. Leave at least the bottom leaf to allow the plant to continue photosynthesis.
Why Microgreens Take So Long to Regrow
If you think about it, it is entirely logical that it takes a longer time for microgreens to regrow vs. the initial growth time. The plant has already put all of its energy and resources into sprouting up, forming leaves to collect more resources. After cutting/trimming the microgreens, you take away many of those hard-earned leaves and also leave a gaping wound in the plant.
The plant now not only needs to regrow more leaves, but it also needs to heal the wound you left. This costs more energy and resources, meaning it will take more time to regain what was spent. In the end, the plant may or may not regrow based on how vulnerable it is, the conditions it faces, and the quality of the soil it is planted in. What does regrow will not be of the same quality, either.
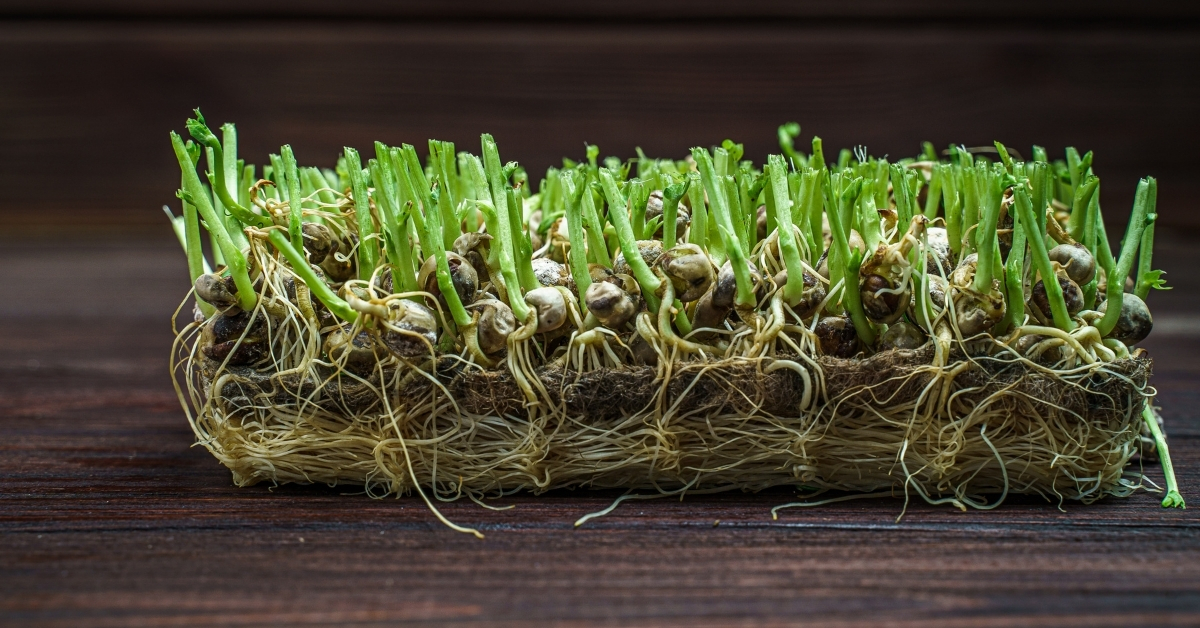
Typically, the microgreens with more developed root systems have a higher chance of regrowth. However, this is not always the case. Keeping the tips from the previous section in mind is your best bet at being successful in regrowing your microgreens.
What to Do If Microgreens Don’t Regrow
The best thing to do if you’ve already attempted to regrow your microgreens, and they failed to continue growing, is to start over. By this, I don’t mean to replant more seeds in the same soil. I mean, dumping out the soil and starting fresh. Or, at the very least, turn the soil over and plant on the opposite side – although this comes with other challenges that will be discussed later.
On the other hand, you can recycle the soil into a compost system, but reusing it immediately generally results in a poor crop. Old soil, particularly of a crop that had a low (or nonexistent) yield, very likely harbors a lot of bacteria and fungi that can easily infect the next batch. You’ll thank yourself later if you start anew.
Why Regrowing Microgreens Isn’t Worth It
Although the idea of regrowing your microgreens to get the most out of your resources seems realistic, you will probably find the process impractical. It makes sense, given that it takes less time to grow an entirely new tray of microgreens than the time and energy spent trying to regrow a previous tray.
Before you invest yourself into trying yet another batch, here is a basic outline of why, if you’re growing microgreens more than merely as a hobby, it’s better not to regrow microgreens:
- Time: The regrowth process will take longer than the initial crop or even growing another tray. The plant has to recoup what it has lost before it can pour more resources into generating more growth.
- Nutrients: The second round of microgreens don’t contain as many nutrients because those were primarily used up in creating the original growth.
- Yield: We’ve already covered that the yield will be much less. Much of this will be weaker and more susceptible to disease.
- Taste: Because the microgreens have developed a bigger root system and have had more time to mature, the tender and flavorful appeal is gone.
Overall a Very Different Product
In addition to a lower yield, up to as much as 70% (some of which may be mistaken as regrowth, but may be a result of late germination due to overplanting) of the original yield, the taste of the regrown microgreens leaves something to be desired as well.
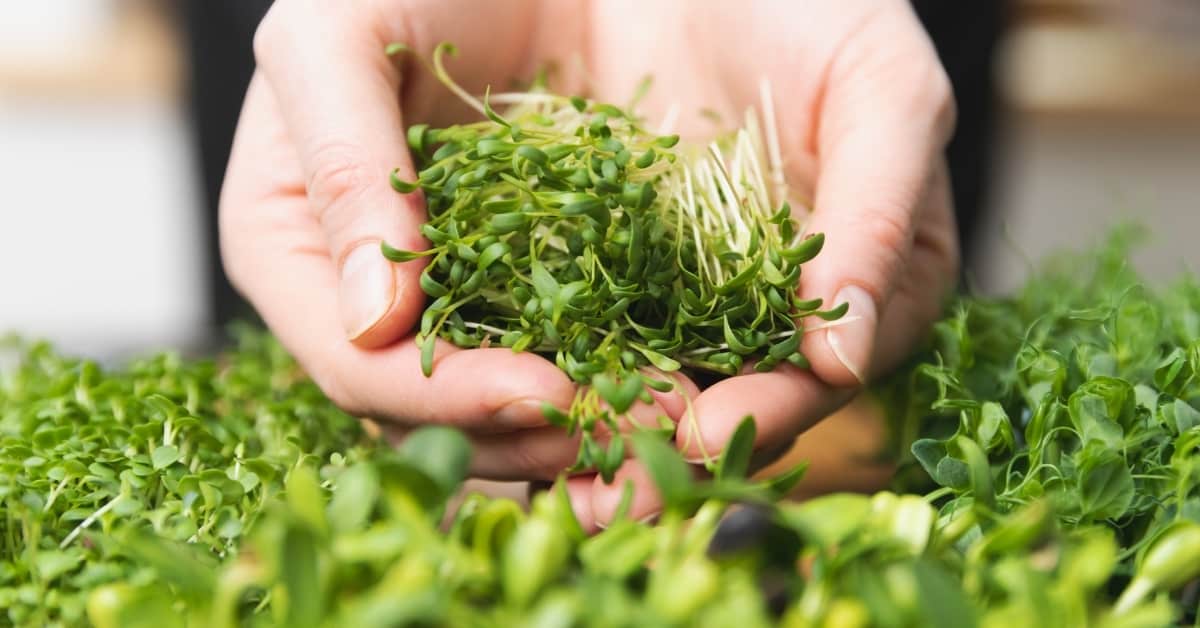
The typical sought-after taste of microgreens is the slender, tender green shoots of the first growth. The regrown microgreens already have a developed stem and leaf, which will mature as more time goes on.
The microgreens that do regrow will likely have a host of different issues. The gardener must be willing and able to take on stunted microgreens much more susceptible to mold. Meanwhile, the still nutrient-rich soil could have been composted and reused not long after too much greater success.
Black Out Phase
During the germination of the initial crop, there is also what is called a “blackout” phase, where it is not exposed to light at all. This develops the desirable and more tender leaves. However, too much time out of sunlight means depleting a source of energy, resulting in a limp, weak, or withered stalk.
For regrown sprouts, there is no blackout phase because the leaves and stalk are already developed. This means that the microgreens will have a more mature and somewhat tough texture and flavor.
Commercially Infeasible
Commercially, regrowing microgreens is pretty much a no-go. It is impractical both in terms of labor and finances. In terms of the environment, it has little return as well. Taste-wise, many consumers prefer to purchase the initial, more tender crop over the more mature regrown microgreens.
However, it’s up to you if you would like to attempt regrowing your microgreens from your own home. It can be a challenge, but perhaps you might like the flavor more. Or maybe just the satisfaction of succeeding in doing something considered difficult and infeasible by many others is enough for you.
Alternatives to Re-Growing Microgreens
If being economical is your goal, and getting the best product for your efforts, regrowing is not it. Here are some helpful alternatives to regrowing your microgreens.
Your primary alternatives include:
- Recycling the soil
- Starting a new tray
Both of these alternatives, which can even be done in conjunction with one another, can be less time-consuming and labor-intensive as attempting to regrow your microgreens. And you will have a harvestable, healthier crop with a higher yield than if you’d chosen to regrow.
Recycle the Soil
In all honesty, you won’t be saving any money by trying to reuse your soil immediately. The soil used from previous batches not only has the previous stems and root systems but also is a host to harmful microbes for future batches. You’ll be spending more money, in the end, to purchase more seeds to replant a new tray only for it to get infected.
Sifting the soil does not work either. Although it may loosen the dirt and minimize overcrowding from the previous plants, you will still have a bacterial problem.
The composting method only takes 10-20 days and prevents this kind of preventable damage from occurring. Even after producing an entire batch of microgreens, the soil they were planted in is still very nutrient-dense and reusable in the future. Which is why composting it is highly recommended.
Primary Composting Methods
There are two primary methods of composting you may choose to utilize:
- Flip the soil: This is potentially the quickest method. If you flip the soil, this will force the previous batch to begin composting. Make sure to do this correctly, or the same microbial problems, as well as potential mold growth, will result. While composting the previous batch on the bottom, the new batch can be germinating on the top.
- When using this method, it is incredibly important to follow the basic rules of growing microgreens closely. Ensure the soil has proper drainage, allow for aeration to reduce mold growth, and never overplant.
- Utilize Vermiculture: This process takes a little longer, and you will witness the incredible power of worms. Create a compost bin, purchase some worms (or dig them up yourself, if that’s your thing) and add the dirt you wish to recycle to the mix. You’ll have beautiful, composted dirt within a few weeks.
- Note: If you compost things like fruits and veggies, don’t compost your dirt in the same area if you want quick results. They will take much longer to break down.
If worms aren’t for you, you can put the remnants into a general compost pile where it will eventually break down – just at a slower rate. Regardless of the method you choose, the result will be nutrient-rich, fertile soil.
Soil is More Efficient
Unfortunately, if you are using microgreen growing pads, none of the previous section applies. The majority of growing pads are one-time use only and cannot be recycled or even composted. They are nutrient-rich, but this also promotes microbial growth over time.
It would be highly cost and time-inefficient to insist on reusing your pads, but it is also costly to continue repurchasing them. Despite the convenience of growing pads, the soil is more cost-efficient in the long run.
If you do want to attempt reusing your growing pad, follow the link here for some helpful tips. You will need access to an oven, hydrogen peroxide, and nutrients that you can return to the pad after you’ve sterilized it.
Plant A New Tray
In the end, planting a new tray is the easiest and simplest way to start your next batch of microgreens. You can do this while your previous batch of soil is composting, and set batches at intervals so that you can continually recycle soil between batches safely.
Growing microgreens is a rewarding process. Besides, they taste delicious. However, it is typically impractical to regrow your microgreens – and for most, it just can’t be done. At the very least, regrowing microgreens is downright challenging. I hope this article helped guide you if you are planning to tackle the challenge. You should now be well on your way to growing a quality ingredient to create nutrient-dense meals. Best of luck!